Blog Archives

Chrome Allergies: Pole’s Itchy Little Secret
(This article was originally posted on Bad Kitty’s blog, which is no longer active. I pulled an archived, early draft to repost here, since the demand for information is still high. It does not have quite as many photos or personal stories as the original, but much of the other information remains the same.)
As polers, we’re pretty used to a lot of body trauma: pole burns, righteous bruises, and general aches, pains, and whatnot. But, there is one itchy little subset of injuries that doesn’t get a lot of attention: “chrome” allergies.
What is a “chrome” allergy? In short, it is contact dermatitis due to an allergen. Although chrome itself can cause allergies, particularly in industrial uses, the prevailing theory in the pole world is that the allergic reactions dancers have to chrome poles is actually due to the nickel content found in the plating. According to the Mayo Clinic, nickel allergies and other metal allergies are among the most common causes of contact dermatitis. [1] Pole dancers who suffer from these allergies can have reactions ranging from itchy skin, to red patches, hives, and worse, depending on the level of allergy and duration of exposure.

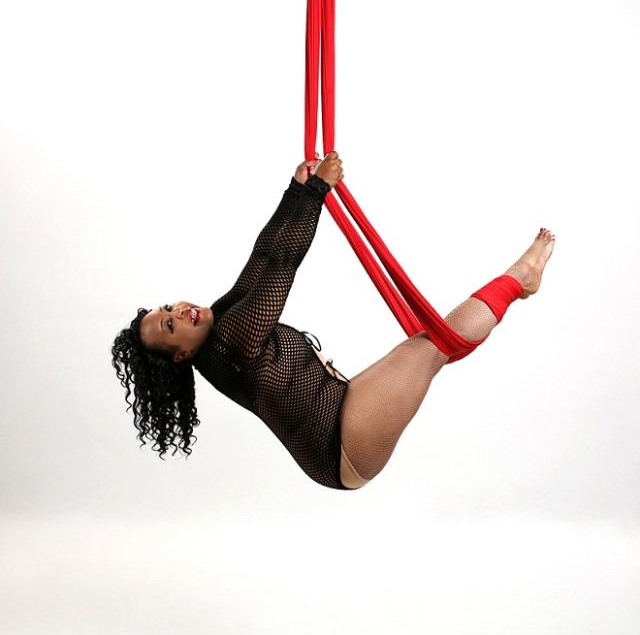
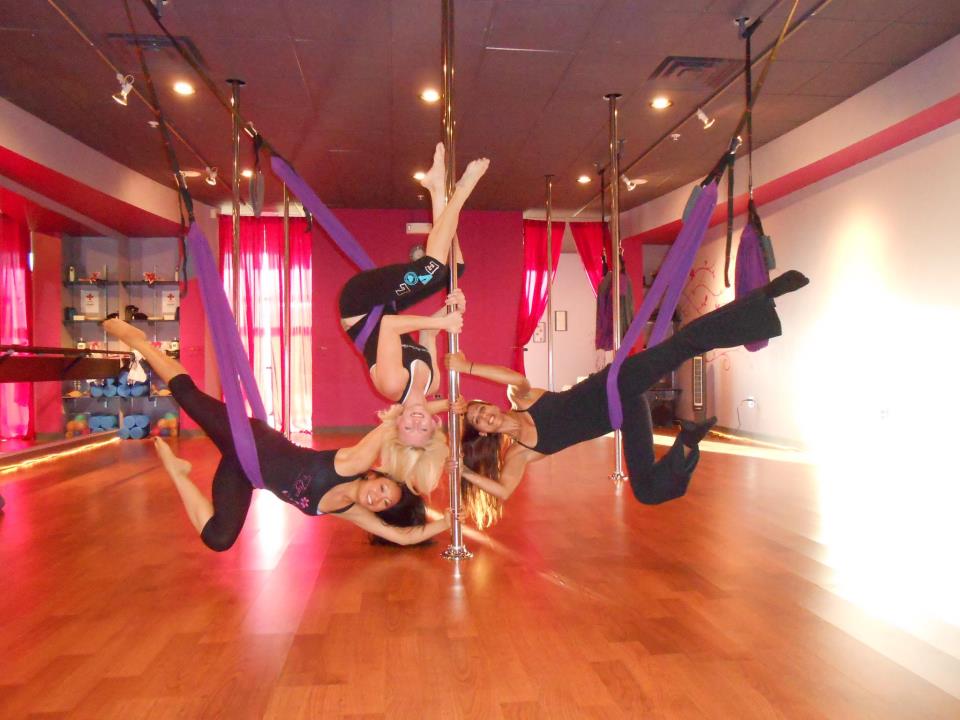
Photo from Michelle Stanek
About Metal Allergies
Metal allergies are more common than you’d think, with studies showing that anywhere from 10% to over 20% of the population may suffer from nickel allergies alone, and these allergies are reportedly on the rise. Women are reportedly more likely to suffer from metal allergies, in part because of the higher occurrence of piercings among females. [3] Within the pole community, some reactions may go unrecognized due to the lack of discussion around the topic. Anecdotal evidence shows that these types of allergies and reactions occur primarily after using chrome poles. Unfortunately, many studio poles in the US, Canada, and Mexico have poles made from chrome, and students with metal sensitivities may get the short end of the stick. They can enjoy class at their own peril and hope they get to a shower fast enough to wash their skin before the reaction begins. If they don’t, they are in for an ugly, painful, and itchy few days…often longer.
Allergic reactions (aka allergic contact dermatitis) can appear similar to irritant reactions (aka irritant contact dermatitis), with many of the same symptoms. A licensed allergist can administer a patch test to rule out allergies, but some differences include the severity of the reaction; the localization of the reaction (ACDs tend to be localized to the contact points, while ICDs are more wide-spread); and the swiftness with which the reaction occurs (ACDs tend to crop up 24 to 48 hours after exposure, while ICDs are more immediate). [2]
Research into how to treat the allergic reaction shows that the recommendation is to clean the skin as soon as possible after contact, then follow with a hydrocortisone cream. If you have a serious allergic break out that includes skin eruptions, you may need to consult your dermatologist for additional care, possibly including antibiotics to ward off a secondary infection.
Some recommended treatment tips from polers I spoke to include:
- Bring alcohol wipes with you to class and wipe down your contact areas as soon as class ends – Follow up with a shower as soon as you are home/able
- Hydrocortisone cream
- Benadryl allergy gel (no greasy finish to worry about!)
- Oatmeal lotion and oatmeal baths
- Essential oils mixed in coconut oil and applied topically (A couple drops each of lavender, tea tree, and geranium oils works best)
- Creams used for diaper rash (i.e. Zincofax or Penaten)
- Topical steroids (requires prescription)
- Chinese herbal remedies/detoxes
Unfortunately, there are not many ways to prevent an allergic reaction that don’t involve a) keeping your skin covered b) applying a lotion that will block the allergens, or c) using stainless steel poles. While poling in sticky pants can be an option for pole dancers, we all know that lotion and poling don’t mix. The best option is avoid chrome all together, which is pretty difficult if your home studio doesn’t offer stainless steel poles. In a city like Los Angeles, where there are many studios to choose from, it’s easier to avoid chrome if you need to do so. But in smaller markets, students with this allergy are likely to be stuck with chrome as their only poling option. Silicon coated or powder coated poles are also options, but again, these are difficult to find in most markets, particularly in a studio environment.
These allergies are so common that even world famous polers like Marlo Fisken, Bad Kitty® Brand Ambassadors Michelle Stanek, Lou Landers, and Nadia Sharif suffer from them. In Nadia’s case, her allergy was so serious that topical steroids failed to resolve her issues. After a follow up appointment with a doctor, she had a blood test that diagnosed her with metal toxicity. Due to the severity of her skin lesions, she was forced to take a 2 month hiatus from training while she healed. It began with training on old, chrome poles in humid weather; the first signs were sores and blisters on her hands and feet, but it soon progressed to cracked, bleeding skin that would not heal, despite the use of topical steroids. Nadia was able to get help through Chinese herbal detoxes, but she avoids chrome whenever possible; when she does have to train on chrome poles, she resumes her Chinese herbal treatments.*
In an effort to hear more about how contact dermatitis impacts polers at all levels, we reached out to polers across the US and into Mexico with the allergy. All of the respondents reported similar symptoms after using chrome poles, particularly in humid conditions: itchy, red rashes localized to contact areas such as armpits and torsos/sides, and in severe cases, vesicles (blisters), sores, and/or cracked skin that failed to heal. You can see a gallery of their photos at the end of this piece. One featured poler, Andrea Plancarte of Mexico, told us that her symptoms included itchiness, particularly on her contact points, with vesicles forming about a week after exposure. These vesicles eventually burst and cause erosion of the skin, with flaking and cracking skin scales that prevent her from poling. Her dermatologist recommended using only stainless steel or silicon coated poles for training, but she’s found it difficult to locate studios near her with stainless or silicon options.*

Photo from Lara Michaels
How do poles cause allergic reactions?
To find out a little more about the science behind chrome use in poles, we sat down with an expert who not only has his PhD in Chemistry, but also has the good taste to be the significant other of a pole dancer! He helpfully laid out how these types of skin reactions could easily occur:
The chrome poles are almost certainly manufactured with nickel, as that’s what you electroplate chromium onto to get that classic “chromed” finish…So, you’re looking at chromium electroplated onto nickel. There is a very high probability that the contact dermatitis is being driven by a nickel allergy, not a chrome allergy. Nickel is a notorious allergen…and has been demonstrated to dissolve in water due to corrosion from extended contact with sweat. The most straightforward explanation is that the chromium is wearing off due to extended contact with skin/sweat, exposing the nickel and that’s what’s causing the problem.
But where does the chrome plating go? Dancers have been concerned that it may be absorbed through the skin, but our Chemist had this to say:
The takeaway here is that the rate of chromium oxidation is likely to be extremely low and very unlikely to be a health hazard. The first oxidation state of chromium (Chromium III) is very, very poorly absorbed across the skin and almost none of it will be generated in any case. What you’re seeing is very likely the chromium just coming off in microscopic particles due to friction – there’s probably a very light dusting of it on the studio floors…it is very, very, very unlikely to be absorbed into the body.
We also asked about how chrome poles become stripped, exposing the nickel plating, and his answer was fascinating. While the quality of the electroplating will have a lot to do with how quickly chrome will break down, the ultimate reason for the wear is that chrome requires care that is the opposite of how it is treated in pole. To maintain the shine and integrity of chrome, oil or wax is recommended, and polishing is discouraged. Between the use of alcohols and cleaners, to the friction created by skin grips, slides, and general contact with skin through movement, the chrome on poles is likely to not survive use in a pole dancing environment.
Why is chrome so prevalent?
Chrome is a popular finish for many pole dancers because of its grip / ability of the skin to stick to the pole without sliding. We reached out to leading US pole manufacturer, X Pole, to find out more about the pole finishes they offer. Until recently, X Pole offered only chrome options for their studio Build-A-Poles, but they do now have stainless steel 45mm Build-A-Poles available for studios in the US, as well as brass 45mm of the same style for Canada. Until demand grows, these options will remain limited to their respective North American markets, but they are available by inquiry (as of publication, neither option is listed on the US website). With the new stainless option, the main base pole is stainless, but the extensions for higher ceilings are chrome – again, until demand increases, this is unlikely to change. While X Pole’s home poles are made in a variety of finishes, home poles are not suitable for the battering that goes on in a studio environment.
Another reason why we see a lot of chrome? It’s usually priced more affordably than stainless. When starting a pole studio, there are a lot of expenses to factor in, and this is one way for studio owners to keep costs within budget. Many students prefer the grip of chrome to stainless or brass, so chrome can also be a crowd pleaser for those who do not suffer from metal sensitivities.
What are the alternatives?
The other main US brand, Platinum Stages (now owned by X Pole), does offer single piece, stainless steel poles for studios, but their poles are not as widely sold outside of major US markets, and therefore, not as easy to find. The company has also been plagued by customer service complaints, which has reportedly hurt their trustworthiness amongst studio owners. Lupit Poles are an excellent option for studio or home use, being that they are stainless and well made – their popularity in the US has grown over the last few years (since the original publication of this article), and they are my personal choice for a pole. A lesser known US brand with studio pole options is Pole Danzer, which offers 45mm and 50mm stainless or brass permanent mount poles, as well as some portable options. Unfortunately, based on our research, there is no 40mm stainless studio-quality option currently available on the US market.
What can you do?
Please remember: each dancer is an individual, and while allergies exist and skin reactions may pop up, only a dermatologist, allergist, or licensed physician is qualified to diagnose the condition and cause. Not every dancer will react to chrome poles in the same fashion. For studio owners, we strongly recommend caution in exploring your options and best practices for your studio, students, and market.
Some additional resources regarding chrome and nickel allergies:
[compiling a list of links on nickel allergies, chrome allergies, and contact dermatitis]
[1] Mayo Clinic – Nickel Allergy Definition

The Cost of Being a Pole Instructor
So you want to be a pole instructor? Awesome! First, head over to the Alloy Images blog for a fun take on the joys (and occasionally not so fun, but still funny aspects) of being a pole instructor. They do a great job at covering it with glee!
Now, let’s get down to the serious stuff. Being a pole instructor comes with a lot of responsibility (duh), but what may not be obvious is that it can also cost a lot. Not just financially, but physically and emotionally, too. I’ve been thinking about this off and on, discussing it with my friends who teach, and I’ve finally put together a list of costs associated with teaching pole – with some bonus help from members of one of the excellent, private Facebook groups dedicated to teachers and studio owners. (Thanks all!)
FINANCIAL COST
You might think that teaching pole is a means to extra income. Sometimes, that is true! Buuuut, not always. Here are some costs to consider:
Insurance
If you are teaching pole, you must have proper instructor insurance. To not insure yourself as an instructor is to leave yourself open to potential lawsuits should a student be injured in your class. While studios should have their own insurance, that coverage will vary (it may not cover you as an instructor), and you should ALWAYS protect yourself, regardless of the level of insurance at your studio. Do your research into coverage; make sure you choose a plan that covers pole. Personally, I have insurance through Alternative Balance. They offer options for part-time and full-time instructors, plus they specifically cover pole. My yearly rate comes out to just over $200, before adding my studio as an Additionally Insured. Make sure that you add every studio you teach at to your policy – this can cost anywhere from $10 to $25 per studio, on top of your premiums. Other policies are out there, and they can be expensive!
As a pole instructor with a muggle job that provides me with health insurance, I am afforded the privilege of not having to pay for it fully out of pocket. But if you plan to make pole your central means of work, health insurance is something for which you will need to budget – you do NOT want to get injured without coverage. Trust me. Plans will vary, but when I was getting insurance through the Affordable Care Act (aka Obamacare) from 2013 to 2014, I went through Covered California and saw plans that provided bare bones coverage for very little, to “Cadillac” coverage plans that cost a few hundred dollars a month, even after subsidies (at the time, I was making about $24,000/year, so my subsidy offers were decent, and I went with a medium level plan that cost around $125/month).
Certifications
There are a number of Pole Certification companies out there, and none of them are particularly cheap. You’re looking at a minimum of $500, to close to $1000, for any certification course. Now, do you absolutely NEED to be certified? It depends on your studio (some will require it). Personally, I have some mixed feelings on it.
I am certified through Pole Moves. I found my certification helpful for a lot of things that a good teacher will need: warm-up concepts, verbal cues, safe spotting, how to plan and manage a class, etc. Those things are invaluable, and a certification can really help you in these matters. What it cannot do is give you apparatus mastery and the personality that is suited for teaching. Some folks are natural teachers, or can cultivate that skill set to become good teachers. Others…just don’t have it. Even if they’re incredible polers who have apparatus mastery…they might just suck at teaching. It happens. A certification may help that, or it may not. Overall, I feel that certifications are a smart investment, but I do not feel that they will automatically make you a good teacher.
Another type of certification that is important to have (but seems rarer) is CPR/First Aid. A quick search on the Red Cross certification website shows prices ranging from $75 to $120 for a certification class, depending on the type of certification you want. This brings me to the concept of group fitness certifications: in addition to a certification that is pole specific, you may also want to be certified for group fitness through an organization like ACE, AFAA, etc. This takes time and dedication, but also money – anywhere from $300 to $600 register, not including other fees for prep materials, tests, etc. (it varies depending on the organization).
Continuing Education
As a teacher, it’s important to continue to learn. That can cost money. Maybe it’s a new certification, a private with another instructor, a trip to a pole-centric learning event (i.e. a convention or a retreat), additional classes, etc. Trips to large pole events or retreats can cost A LOT – thousands of dollars – and even additional classes can add up. Some studio compensation packages include free classes for instructors, but others do not, which brings me to…
Compensation
Being a pole instructor can mean some extra income! Yay! But…not always. Before coming on board with a studio, make sure you know their policies:
What is their class rate?
Some studios pay a flat fee per class; others pay a flat fee plus additional compensation for good class numbers; some only pay in trade (free classes/rehearsal time). Make sure you know what your compensation will be before you agree to teach at any facility. This includes fees for privates! Most studios take a cut of earnings from privates, as much as 50%.
Will you be an independent contractor or an employee?
As an employee, your taxes will automatically come out of your paycheck. As an independent contractor, you will be paid up front, but have to pay out taxes at the end of the year, once your studio issues you a 1099. This means that you’ll need to budget enough money throughout the year to cover your year-end tax bill. Being an independent contractor may also cost you in other ways, like possible fees for music licensing and additional fees for tax processing (if you freelance at multiple studios).
What are their studio cancellation policies?
How many students are required for a class to run? For our studio, it’s a minimum of 2 students. If your class is not performing well, you may not end up teaching as often as you think.
Will you actually get paid?
Beyond the established pay rate of the studio, you need to know: will they pay you? This is a serious issue within the pole community. I’ve heard many an anecdote about instructors being stiffed by studio owners, both for traveling workshops and regular classes. If you can, do some research and talk to the other instructors at the studio – make sure that the owners can pay you, and that they can pay you on time. You don’t want to work for someone who is not on top of paying their instructors.
Tools and Supplies
While most studios will have the basics of what you’ll need to teach your classes (i.e. poles, yoga mats, yoga blocks, etc.), you may end up needing to purchase other supplies, like stretching/resistance bands, massage balls, grip aid, knee pads, shoes, pole clothing, etc. Even things like music purchases or music subscription service fees (i.e. Spotify), class planning supplies (including advertising, i.e. if you pay for online design templates to create posters for your classes/workshops) can add up. I have the added issue of supplying props for my movement class, like chiffon. There are also other things to consider, like gas to and from various studios (if you’re teaching at multiple places), portable mood lighting or music devices (iPods, speakers, etc. – not all studios have speakers), and professional pole photos to help market your classes/workshops.
The nice thing about being an instructor is that you can write off most of your supplies at tax time; but you still have to pay for them, so it’s still money out the door.
Recovery – Part I
Being an instructor can take a serious toll on your body. Doing something 18 times, in slow motion, while talking, is exhausting, and the wear & tear can be all too real. As an instructor, it’s important to take care of yourself, and that often means spending money on things like massage, acupuncture, trigger point therapy, chiropractic adjustments, and more. As an example, at one point earlier this year, I saw an acupuncturist for needles and cupping ($90), a trigger point therapist for release work massages ($195 cash), and a chiropractor ($60 + tip for masseuse), all in the span of less than a month – with multiple visits to the trigger point therapist. That’s A LOT of money spent to keep my body functional.
This doesn’t even account for things like proper diet (good food costs money) or supplements, or self-work tools like foam rollers, massage balls/tools, or in my case, the help of a nutritionist. My point is: this shit adds up. And that, in and of itself, can be stressful.

Photo by Alloy Images. Shot at The Brass Ring, featuring Iris Smoot & Manda Ritz.
EMOTIONAL COST
Teaching can be a ton of fun, and it be incredibly rewarding. Any time I see a student nail something they’ve been working hard to get, or find themselves breaking through to a new level, it is THE BEST feeling. I get so happy and so proud. I think about how far students have come, how much I love seeing them work and try and succeed, and it makes my day.
That being said: teaching can also be exhausting.
Time
If you are teaching a lot, you may not have time for yourself. You may be giving up time to do basic things, like errands, or you may be giving up time with your friends and loved ones. If you end up with classes on the weekends, guess who is not going to get to hang out with their friends who have muggle jobs? Yep.
Even if you are like me – muggle job, teaches once a week, with the occasional subbing gig – it’s still hard to make time. On nights where I teach a couple of classes in a row, I am doing it after 8 hours at my day job. I get an average of about 30 minutes of “me” time between driving home (30-45 minutes) and driving to the studio (30 minutes). I usually nap, then shove some healthy snacks into my face on the drive in. When I get home, I usually eat something, plus I still have house stuff to do, and I want to spend time with my husband, and the next thing you know, it’s midnight, and I have to be up in 6 hours. I’m usually quite tired the day after!
Beyond just time to do things and hang with your friends and family, you may also not have time to train. “But, I am teaching all the time! Of course I will train!” Eh, not always. Many instructors I know are so busy instructing others that they rarely get to take classes and be a student themselves. Nor do they always get to go to the studio and work on their own stuff.
You also have to set aside time for the administrative side of things: planning/practicing your lessons, creating/practicing/breaking down choreography, promoting your classes online with video or posters, hustling for new opportunities, etc.
Boundaries
It’s natural for students to become attached to their teachers – and vice versa! – but boundaries are important. Some students will need more attention and time, but if these requests are coming outside of class, and taking up a lot of time, there may be a need for a boundary.
Boundaries can also come into play when your friends take your class. Teaching your friends can be super fun, but if they aren’t respecting you as the instructor – goofing off, talking over you, doing moves not at the class level or part of the lesson – it can be stressful. In that case, boundaries are a must.
Last, but not least: for whom will you be working? What is the personality of the studio owner? How do they run their business? Are you okay with any of their idiosyncrasies? Or will they end up driving you insane? This is an important thing to consider – ask other instructors how they like working for the studio, and of course, use your own judgement. Nobody wants to work for a crazy, flaky person, and if you end up in that situation, boundaries will be important if you want to continue to work for them.
Giving vs. Receiving
As instructors, we give in order to allow students to flourish. Sometimes (often), one small win for a student makes it all worth it. But to put so much of ourselves into something can be draining. You have to make time to feed your own creativity and soul, in order to be of any use to others. This is important to your emotional well-being, and – surprise! – it requires time and boundaries.

Nancy spotting me at The Vertitude. Photo is my own.
PHYSICAL COST
While we all make jokes about how our bodies change through pole, being an instructor means putting your body through different rigors. Repeating moves over and over again, spotting people properly, hours of movement, even talking through moves as you do them…it requires a lot of your body.
Recovery – Part II
I mentioned the financial cost of recovery above, but beyond that: you must take time to recover. Whether this means time off between classes to let your body rest a day or so, to taking time to roll out your muscles and stretch after class, to sit in Epsom salt baths after a hard class, or to even stopping to eat a proper meal and hydrate, it’s imperative you do it. Your body will crap out on you, if you don’t, and then you’ll be forced to take time off.
Maintenance
I’ve mentioned this twice, but diet is an important part of keeping your body in good shape. I don’t mean weight loss. At all. I mean eating the proper fuel to allow your body to function and recover at the best of its ability. This means taking the time to prep your food, and eat your food, and not rush around all the time. It means reminding yourself to keep hydrated. It’s time, and it’s money, but it’s necessary to remain in your best physical condition.
If you’re like me, and you have chronic health issues, this self-care is vital. I have to eat well, and remember my supplements, and make myself drink lots of water. And I have to get good sleep, and do all of the other recovery things I’ve already listed, just to maintain some semblance of functionality. I also have to work regularly with my Nutritionist, and see my doctors…which hey, costs more money!
IN SUMMARY
Teaching requires a lot. Despite aaaaaall of this, I truly love teaching (even when I’m tired and over it, which does happen from time to time). I had to stop teaching pole work classes for about 6 to 8 months earlier this year, due to my health issues, and I missed it. I felt so left out of the progress of my students, and I missed the community a ton. Now that I am slowly coming back to teaching regularly, and being able to pole on my own, I don’t think I realized just how much it means to me. I recently took a day off of my muggle job, just to attend an instructor jam at our studio, and spent 4 hours in the company of a handful of other polers, playing and exploring new stuff. I left SO HAPPY.
My point in putting together this exhaustive list of things to consider is simple: if you want to teach, you should be informed about every aspect of it, not just the fun and amazing things. Knowledge is power, y’all!
Note: I’ll be updating this post if any new suggestions on “cost” come to me, so check back periodically to see if anything has been added!

Studio Spotlight: Aeriform Arts
For the last year or so, I have been regularly taking lyra classes at an Aerial & Pole Studio in North Hollywood, CA, called Aeriform Arts. Over that time, I have struck up a friendship with the owners, Lea & Allelon, who sponsored me for Pacific Aerial 2014. They’re great folks, and I adore my class – I feel quite lucky to have found it!
The vibe of the studio is unlike a lot of others in LA. Everyone is welcome, and there’s no clique-ish-ness. I see people of all shapes, sizes, ages, looks, and backgrounds whenever I go. I got curious about how the studio came to be, so I asked Lea if she’d be willing to sit down to answer some questions about it!
Poleitical Diaries: How were you introduced to aerial arts?
Lea Walker: I have a fast paced career in TV, and I started having serious health issues that forced me to slow down a bit. I ended up bedridden for weeks and realized that the surgery had not only stripped me of my physical strength, but also my sense of body confidence and power. My scars became a symbol of how my body had failed me. I came to the conclusion that maybe I needed to finally slow down and do something for me. After I healed, I started taking pole lessons and then branched out to aerial yoga, which I found really helped improve some back disc issues I was having as well. At that point I was hooked!
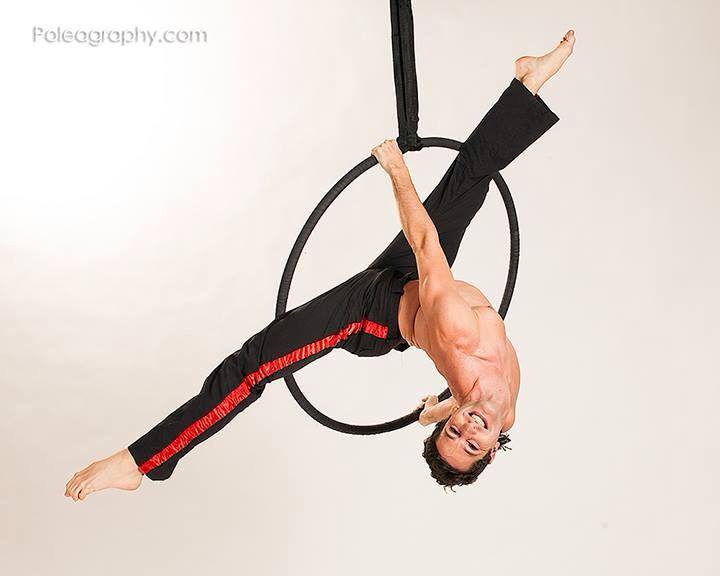
Lea Walker of Aeriform Arts. Photo by Poleagraphy.
LW: Aeriform Arts offers multi level, co-ed classes in Aerial Yoga, Hammock, Silks, Pole, Lyra, Trapeze & Aerial Cirque Conditioning (with stretch & dance workshops as well). We really pride ourselves with having an easygoing yet knowledgeable staff that works hard towards helping our clients explore and achieve their maximum potential. We like to have fun and encourage or clients to as well!
PD: What do you feel sets Aeriform Arts apart from other studios?
LW: I truly believe we are a studio that embraces all levels, ages, sizes & sexes. We really try to make it a fun learning experience for everyone, where everyone is part of the cool kids club. We do not allow any cliquishness and want everyone to feel important and cared for.
Instructor Tavi. Photo by Poleagraphy.
PD: What are you most proud of in regards to the studio?
LW: I love the fact that we are co-ed across the board and that we embrace both sexy and strong aspects of pole/aerial in the studio. Two great tastes that taste great together!
PD: What are some of your favorite studio-related memories over the years?
LW: Wow – there are so many. All of the friendships we have made, being ecstatic when we hit our 1 year & 2 year anniversaries (our 3 year is coming up in Nov), our last student showcase was amazing – I was so proud of everyone. Every time there is a full pole class and all I hear are squeals of giggling, any feelings I have about the energy that it takes to run a studio melt away. But I think the best memory I have is when this one woman crawled out of an Aerial Cirque class, literally crawled – in the middle of class I might add! She was a disheveled, sweaty mess, pooled on the front lobby floor and I leaned over the desk and asked “Um are you okay?” she looked up at me and said “NOOO that shit is HARD” then she tossed her credit card to me and said, “Can I get a 10 pack, and can you sign me up for the next 5 weeks? I love this shit – thanks!” Then she smiled and crawled back into class.
Instructor Leigh of Aeriform Arts.
PD: Is there a class you wish you could add?
LW: Vertical Wall Dance or Bungee Assisted Dance – I am dying to learn it!!!! I would love to offer it but would need the height & instructors to even begin to think about it. Seriously though, I am looking to make a trip to England to take a workshop or two with Wired Aerial Theatre want to go?
PD: What’s on the horizon for Aeriform?
We have some new class offerings in the works! We just added in a Trapeze class, and Candice Cane [is slated] to be joining the studio in January teaching pole, and we’ll be adding a bunch of new workshops, starting in January 2015.
—
You can find more about Aeriform Arts and their classes at www.aeriformarts.com. They have some excellent aerial offerings, from silks, hammock, and lyra, to pole and aerial yoga, as well as special classes like aerial cirque. Thank you to Lea for taking the time to chat with me!
-

- Instructor Chad. Photo by Poleagraphy.
-
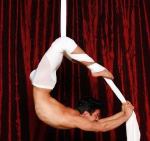
- Instructor Antonio. Photo by Poleagraphy.
-

- Instructor Tamysen.
-
- Instructor Jane of Aeriform Arts. Photo by Poleagraphy.
-

- Aeriform Arts co-owner Allelon (Lea’s hubby). Photo by Poleagraphy.
")
Aura Heels: Your New Favorite Shoes (Part 2)
A few weeks ago, I had the opportunity to interview the creators of Aura Heels – please check out what co-owner Melanie had to say about her experiences with pole dance and being a pole entrepreneur:
https://poleitical.com/2014/08/07/aura-heels-your-new-favorite-shoes-part-1/
Aura Heels was kind enough to send me a pair of their incredible shoes to test out, and I wanted to share my experience with all of you!
My particular pair arrived carefully packaged in their original Pleaser box, with helpful instructions on how to use the light controls, as well as a plug to recharge the shoes. I spent approximately 47 minutes squeeing, tottering around on our carpeted floors, and forcing my boyfriend to take video of me doing legwork on our couch, before I finally put them away and planned my next outing to a studio.
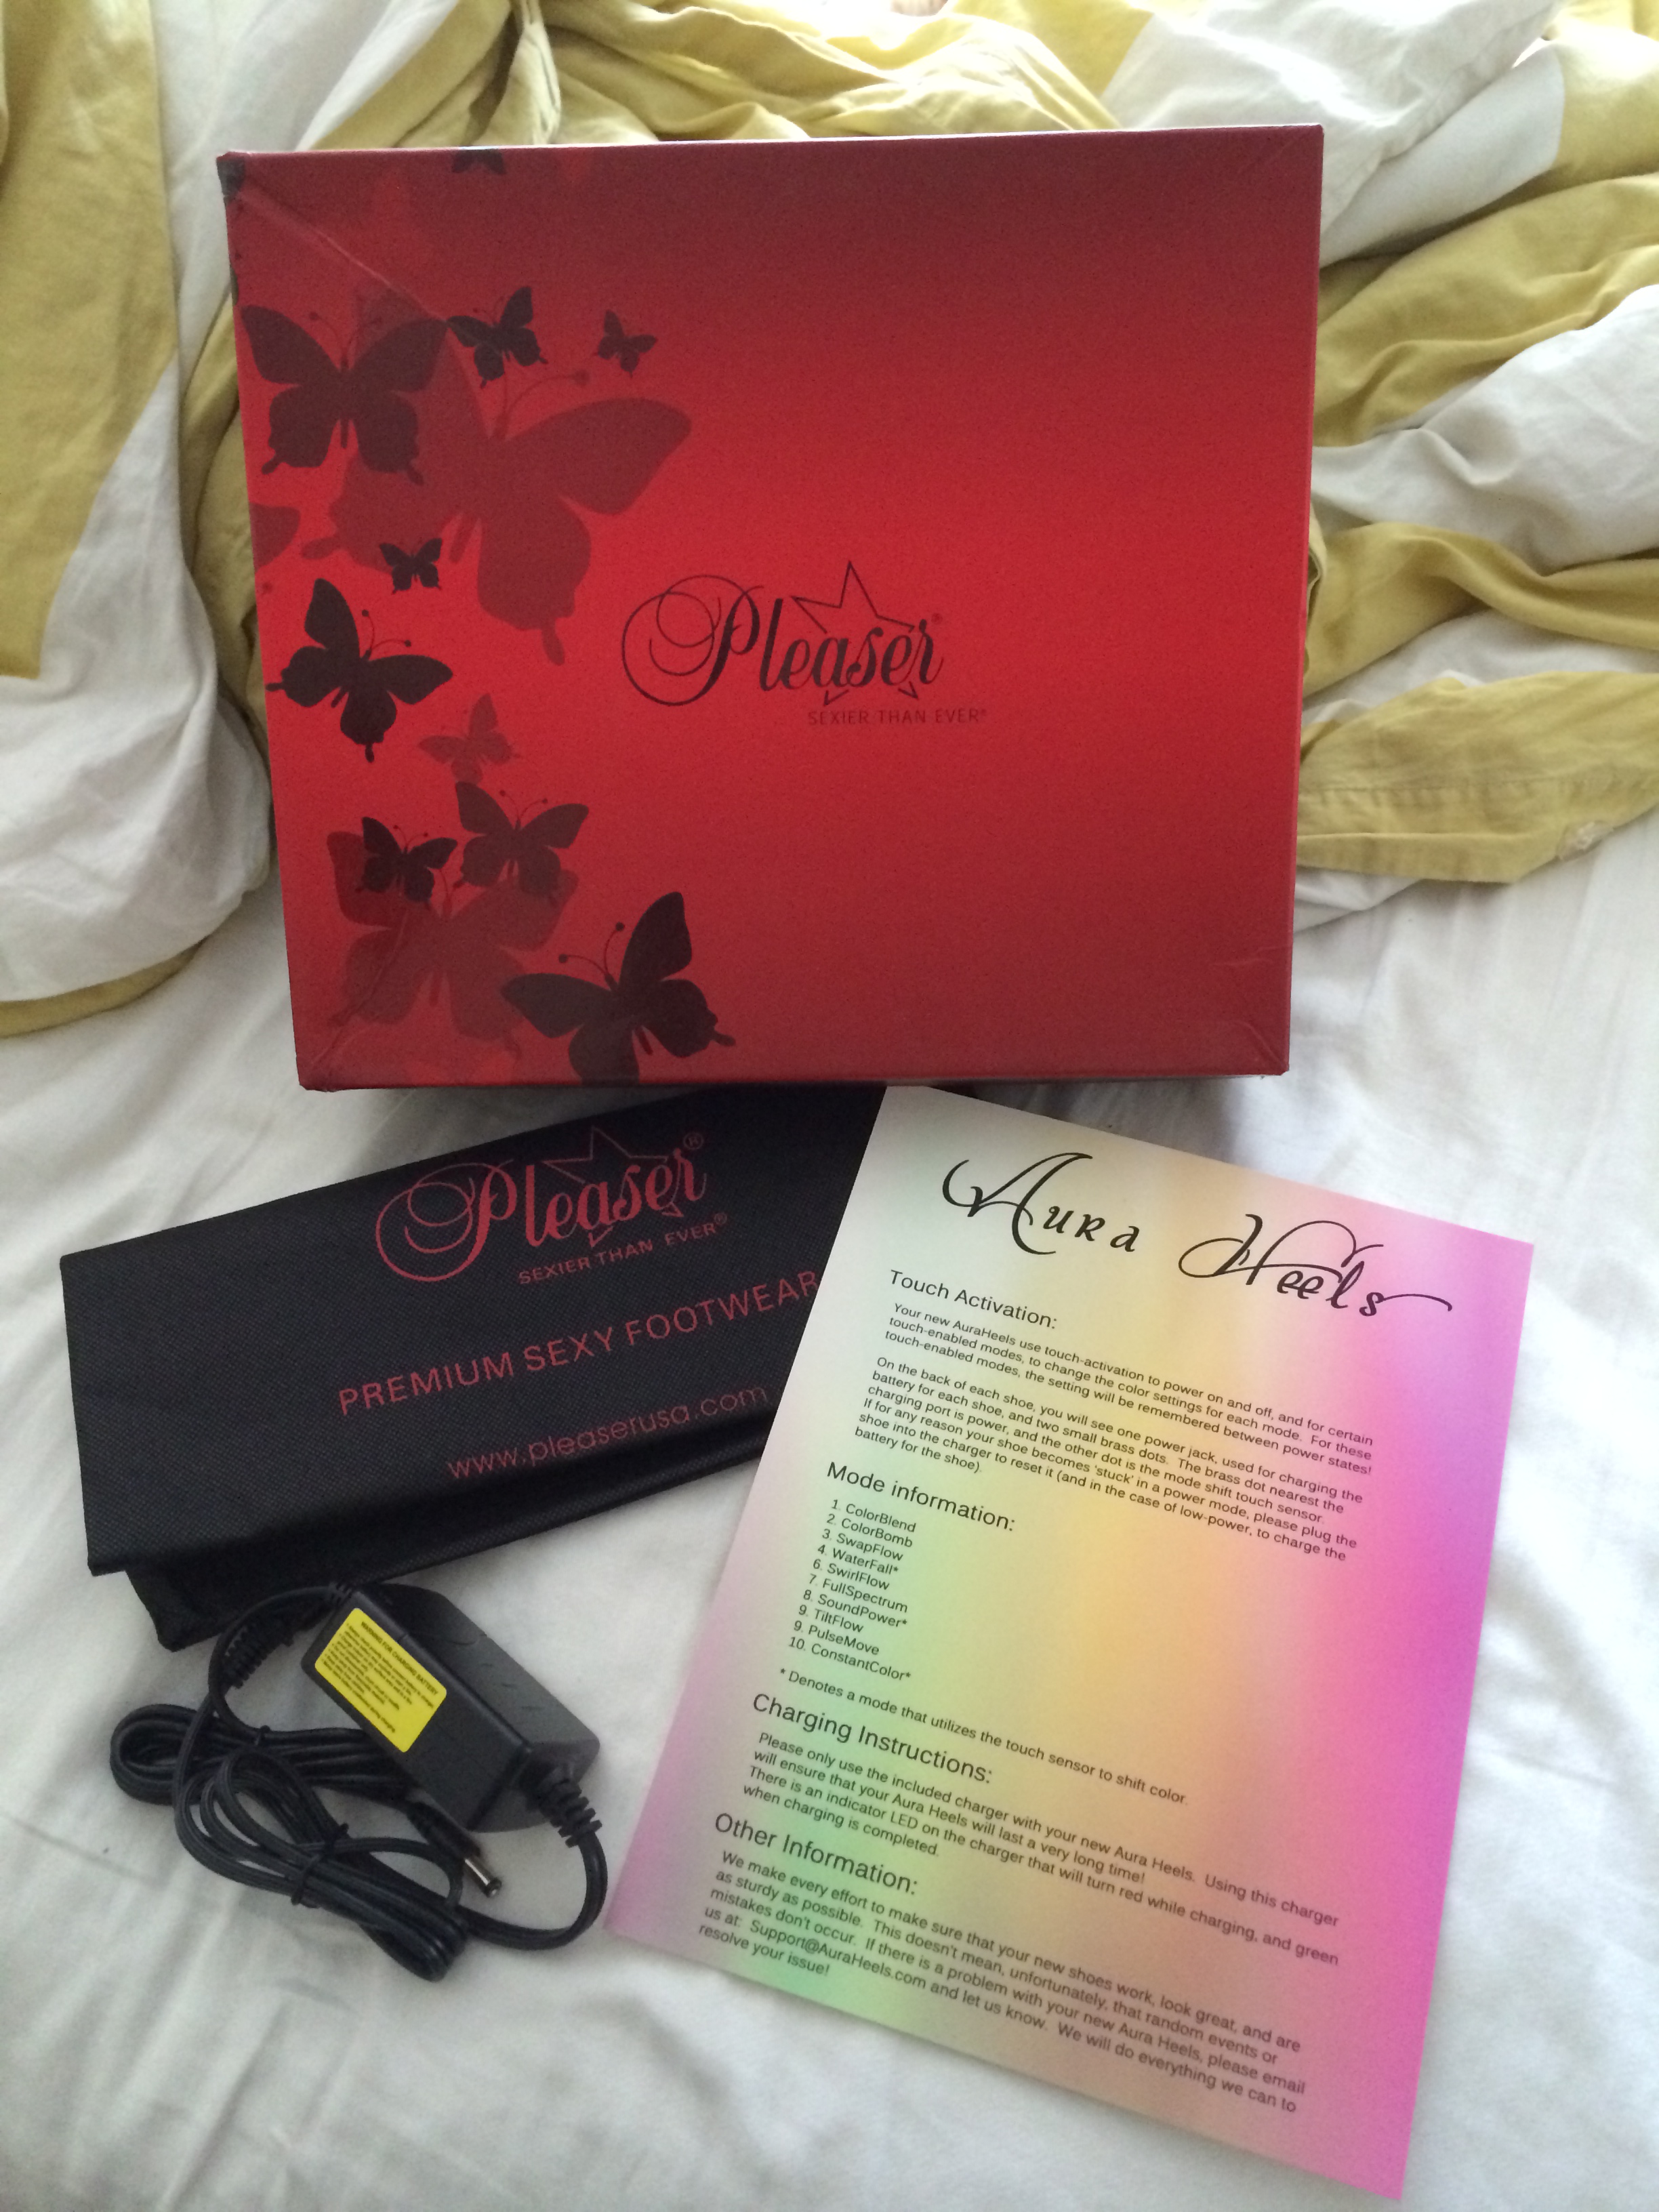
Aura Heels Package, including instructions & power plug for shoes (please ignore my messy bed)
The Basics: Size, Height, and Style
My pair were constructed from a clear, lucite Pleaser platform, with a heel height of 7.5 inches. They feature clear toe and ankle straps, and like most Pleasers of this fashion, you can probably size down a half or even full size if you want them to fit a little tighter. I am a size 8, and my test shoes are also an 8, and they’re probably a tiny bit too big for me, so keep sizing down in mind when placing your order. The weight is approximately 4 to 4.5lbs total for the shoes – I very scientifically tested this by getting on my scale wearing them and also in bare feet.
Aura Heels does offer different styles, including some cool options with platforms that have clear windows in otherwise blacked out plastic, and they will do custom built options for other heel heights, if the 7.5 inch heel is not for you!
The Light
Aura Heels also offers a variety of light modes, including Rainbow, ColorBomb, SwapFlow, TiltFlow (my favorite), ShortPulse, Waterfall, Full Spectrum, Starburst, and SoundPower. I’ve put together a YouTube Playlist of their sample videos, so you can get an idea of what each mode looks like: http://youtu.be/pe6vX8-c6Tc?list=PLTSEkwQRjm00r0Py-eZA7bq4fUhD5jSG3
As for the color: it is SO bright! It’s super vivid, and absolutely eye-catching – the shoes make a huge impression, and people will stop to watch you! I brought them to two different studios, in classes with different women, and they made a big splash every time. I had girls asking to try them on, to take photos in them, and to just take photos of the shoes on me! (I’ve also had a few people ask to borrow them for photo shoots!)
I cycled through all of the modes offered with my pair, but I kept coming back to the TiltFlow, because it’s such a brilliant option. I love the way the colors shift as the shoes move, and they remain illuminated throughout the movement. The lighting in the room does make a difference in terms of how well the shoes show up on film: darker is better, and the faster your movement, the less the camera will pick up the different shifts, but you can TOTALLY see them in person.
Durability/Functionality
The sole of the shoes do heat up a little from the light, which threw me off at first, but it never gets more than a little warm. The colors stayed true throughout a six minute, floor work heavy test dance that I did, and they performed just like any other shoe during my on-the-pole test. I’ve used them off an on for the better part of a week, and have not yet had to recharge them.
If you’re a heel-clacker, I’m not sure these would be for you, as I don’t know that the electronics could survive that kind of battering – most shoes that get clacked often seem to have a short shelf life, so I wouldn’t recommend it in these heels. I did one small clack, and they held up fine, but repeated wear & tear would probably take its toll like on any other shoe. Given that these heels can’t really be repaired if you clack them out of existence, it’s probably worth it to save your clacks for a less expensive heel.
Price
The heels are pricey, but that makes sense to me, given the work that goes into their construction and programming. There is nothing else like them. The low end begins in the high $100’s, around $175, which is on par with some of the higher-end rhinestoned Pleaser options. Much of their range is in the mid $200’s, and the line tops out around $400 for their highest tier offering, the Limited Edition Galaxy Platform. Choosing your option has everything to do with which light mode you prefer: you can save money by choosing an option with just one light mode, instead of trying to go for one with multiple offerings.

Eat Your Heart Out, Cinderella! (Aura Heels – photo by Poleitical Diaries)
Overall, I loooooooooooooooove these heels, and I am so stoked to have gotten the chance to play with them! They’re just the coolest thing I’ve seen in ages, and I am so excited to see Aura Heels getting more recognition from our community! They were recently at The Great Midwest Pole Convention, and received news coverage from local Chicagoland papers/tv outlets, and their web presence has been steadily growing these last few weeks! To shop their line, head to their Etsy Shop: https://www.etsy.com/shop/AuraHeels – find them on Facebook at: https://www.facebook.com/AuraHeels – stalk them on Instagram at: http://instagram.com/auraheels (@auraheels) – and watch their full line of videos on YouTube at: https://www.youtube.com/channel/UCa0fzz7HRvsJTGBqzPc_xcQ
My Night with Marlo
As much of a pole fan as I am, you’d think I’d have taken a workshop by now, but no! I’ve taken a class from Natasha Wang at a local LA studio, but never an actual workshop taught by a pole star (by the way, Natasha is great, and you should always take classes or workshops from her).
Thanks to the generosity of a pole friend, I was able to attend my very first pole workshop last night…with Marlo Fisken.
Pause for extreme fan-girl reaction.
I was in shock. It was such a nice gesture, and I can’t even think of how to say thank you properly!
In preparation for the big day, I squee’d a lot and made my boyfriend watch multiple Marlo videos, like this one:
Marlo’s workshop was at Smoke and Mirrors Fitness in Orange County, which is about 20-30 minutes from my house depending on traffic. I had never been there, although I know some of the students – it’s a nice place! Super tall poles, very atmospheric. I hope to get to take one of their classes sometime! A few of my pole friends from LA came down for the workshop, too, and it was nice to have friendly faces.
Marlo herself is art in motion. She moves like liquid. Really hot liquid. The workshop was focused on her flow movement, so we worked on the principles of creating seamless motion and continuous movement in transitions. It was tough in different areas, for all of us, but some people got the tricks faster/easier than others. I was not one of those people. 🙂 I struggled.
Our warm up was movement based, and while it was tough, it wasn’t impossible. I kept up for most of it, and my asthma kept itself in check for most of it, which was excellent. The movement was so foreign to me, so it was like learning choreography while trying to stretch and get warm. It was interesting while being challenging, which I appreciated. Marlo also had us do some conditioning and floor moves that were also interesting – cartwheel presses across the floor were tough, but the floorwork (shoulder stand/roll) was very cool.
She followed up the warm up/conditioning with spin instruction, and wow. She’s so pretty in her technique. She just floats. Her instruction was meant to teach us how to achieve that kind of flow, but I had a really hard time with the timing of the hand switch – I got it once, I think, out of all of the attempts I made. I ended up working on the three segments of the spin separately, in hopes I could tie them all together once I had the basics. It was tough to not get something I felt like was fairly simple, but it definitely spoke to my weakness at pirouettes – a simple transition that has always tripped me up. She taught a cool move out of a spin that landed on the floor, but it was tough for most of us – I hope to work on it some more in my normal classes.
Part of Marlo’s trick instruction was based off of aerial inverts, which are my nemesis. I would rather try a fonji (which I do not have the skills to do) than do an aerial invert. All of my pole friends and instructors tell me I can do one, and I am sure that I can, but I have failed at them for so long that it’s become a mental block. So, when Marlo included it in the instruction, I was immediately put in the position of having to suck it up. Which is good, because I NEED to suck it up, but it was a tough thing to do when I had just felt like rather a failure at the spin instruction.
How did I do? Meh. I ended up just feeling bad about the fact that I was sharing the pole with one of the instructors from Pole Garage, who ended up having to help me quite a bit (I felt like I was infringing on her learning experience, which is really just my brain being mean). She did an incredible job keeping up with Marlo, though – it was so fun to watch her do well.
Regarding my own work, I will say this: I did a few aerial inverts better than I ever have before. I usually struggle a huge amount, and I did okay – especially since they were on my non-dominant side. So, I consider those to be wins – the fact that I even got into the invert is a big deal. (It may not sound like much, but consider the fact that I was so under-conditioned on my non-dominant side that I couldn’t even invert from the floor a few months ago – and the fact that I can barely aerial invert on my dominant side.) In fact, I was so unaccustomed to aerial inverting, especially on my non-dominant side, that once I had gotten up, I was totally confused on what to do. I couldn’t sit up over it to continue the climb – it was like my brain shut down. It’s entirely possible that I have never climbed up on that side!
To end the class, Marlo gave us the challenge of stringing randomly chosen tricks together, with the aim of having there be the least amount of steps in between. It was really challenging, but in a fun way – we had to really think about it, and some of the success depended on our level of expertise.
Marlo is ridiculous to watch. She’s the most graceful person I have ever seen – she floats in slow motion, but still moves quickly. I don’t know how to explain it, but watching her was incredible. It was like taking an acting class from Meryl Streep. A really sexy, buff Meryl Streep.
I left the workshop and realized very quickly that I was up in my head. I was thinking, a lot, but was not immediately able to pinpoint what it was that had me so introspective, if not upset. I kept thinking that I should have been super elated and excited, but I wasn’t. I did not walk away inspired and energized, and it took me a while to figure out why, until I realized what the overall lesson was that I took away from the night:
My lesson learned was that of commitment. That to be excellent at this thing that I love takes a commitment that I have yet to show. A commitment that I’m not even sure that I have in me. It was a real wake up call. To even be a little better than I am – not even like Marlo or Natasha or any of the greats – but to just invert in a pretty way, to get my aerial invert, to not struggle so much to make things smooth…that all takes commitment. It was really daunting to realize. I was a little despondent to have that reality check, even though it seems SUPER obvious – OF COURSE it takes commitment and hard work! Um, duh? As of late, I had been feeling stronger in my pole work – like I was physically stronger than I had been (and I know it’s true), that I was getting things I hadn’t gotten before, that small things were getting better. So, I think I was just really surprised to feel so far behind, even though I know I’m not some great poler – I’m never the most advanced in any of my classes, by far. The simple feeling of being rewarded by doing a little better than I did a few months ago was kind of squashed when I saw the long road ahead. It seems so far away, to be so good. Or, to even be the kind of good I feel like might be attainable to me.
It didn’t make me want to give up. It just left me distressed. If you haven’t read Sparrowhawk’s wonderful new post about comparing yourself to others, do yourself a favor and read it – it totally applied last night. I left that workshop upset with myself, and while I was able to see the small victories in what I did, I was also afflicted with a heavy dose of “NOT ENOUGH”-itis. And, really, that’s a mindset. It’s an opportunity to recognize it for what it is (a cognitive distortion) and to be forgiving and gentle with myself as I lead my poor, bruised self out of the dark alleyways of my mind.
As for what to do next: I want to work in more classes, to fix the things that are not pretty, to master those things. I would say that I don’t know how, but the HOW is to just do it. How is a road block for most people, myself included. The how is to go to class whenever I can, to work on those little things in between the lessons of class, to work on the conditioning at home. To allow myself to recognize the small wins along the way, and to look at the next step in front of me, not the entire staircase to the penthouse.
I might never be Marlo, but I can be a better version of me.
with Marlo
PSO National Championships on Chirpstory
Did you all get a chance to watch the live stream of PSO‘s National Championships? I was so bummed to not be there in person, but it was nice that UPA had the stream for everyone!
The performances were so fun – it’s always interesting for me to watch pole dancers of that caliber and see what speaks to me. I love character driven pieces – they stand out for me, always. That’s one of the reasons I was overjoyed when Sergia won! She’s one of my favorites.
While the professional videos from Alloy Images have yet to be published, I am looking forward to reviewing some of the performances – I missed Danielle Romano (who took 2nd place) and Amber Cahill, and missed moments from the first few performances because of technical difficulties with the feed. However, I was live tweeting everything I did see, and I’ve created a Chirpstory of my tweets:
http://chirpstory.com/li/111639
Congrats to Sergia (1st), Danielle (2nd), and Mary (3rd) on their wins, and to ALL of the competitors from last night. It takes a lot of guts to go up and perform in front of so many people, and under such high stakes! You did us all proud!
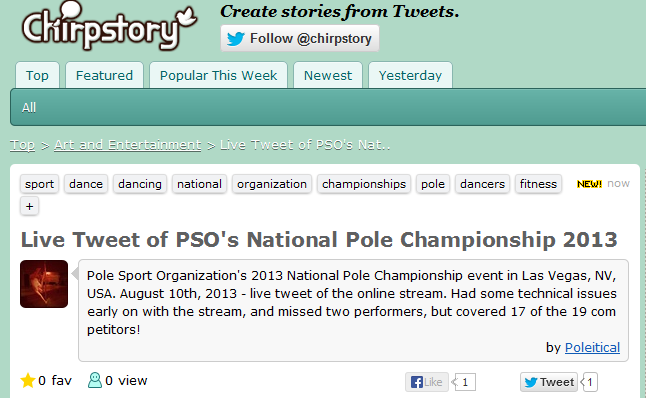
Live Tweet of PSO National Championships on Chirpstory
Brand New Items from Poleitical Clothing!
Woohoo! Our new items are finally here!!

New Items from Poleitical Clothing
We are SUPER excited about these new additions to our collection! All of our artwork is ORIGINAL – we took great time and care in drafting these designs and their wording, and we hope they are as fun for you as they were for us to create!
The Drea Booty Short:

The Drea Booty Short – Panties Are My Power Suit
Named in honor of Drea, lead instructor and owner of The Pole Garage in Santa Monica, CA, our new booty shorts feature a higher, cheekier cut than our classic shorts! They are super comfortable, made from soft cotton, and come only in turquoise (for now!). Our Poleitical Clothing logo graces the front, and our new PANTIES ARE MY POWER SUIT artwork is stamped on the back! The shorts come in sizes Small, Medium, and Large – they do run a bit smaller than our classic shorts, especially because of the overall sexier cut. Priced at $17 USD, with worldwide shipping available.
In Pole We Trust Cropped Tank:
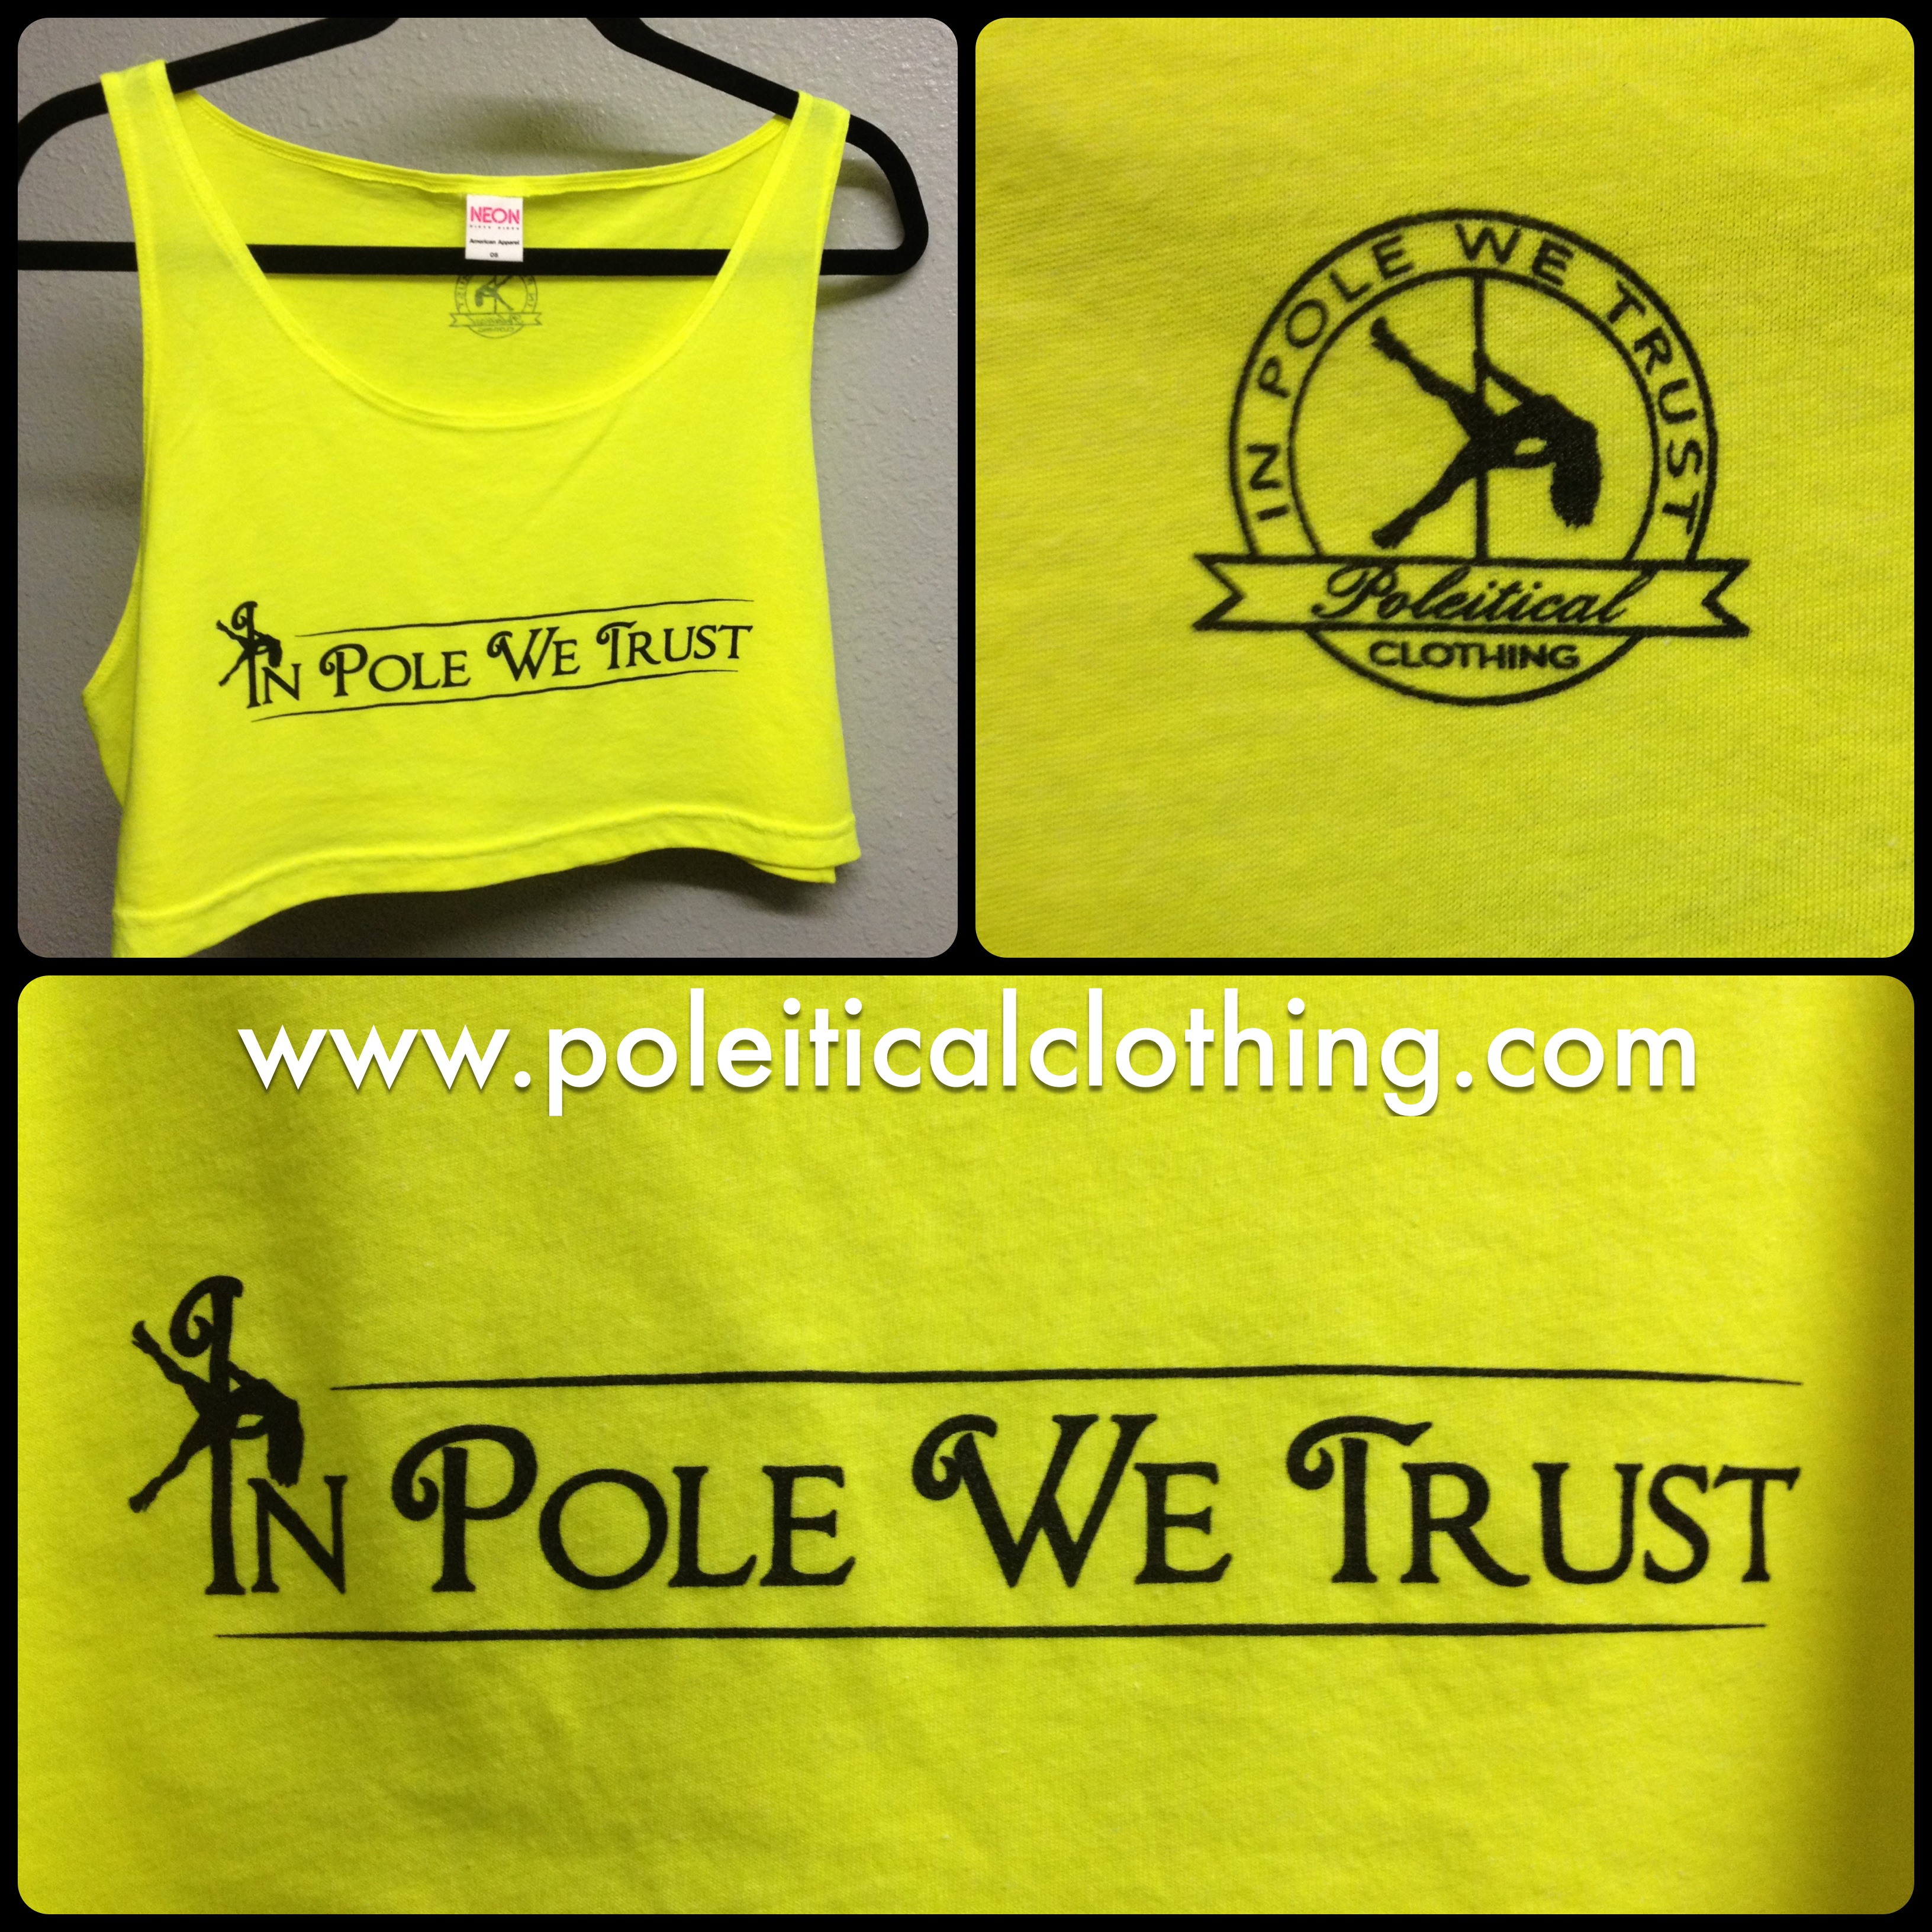
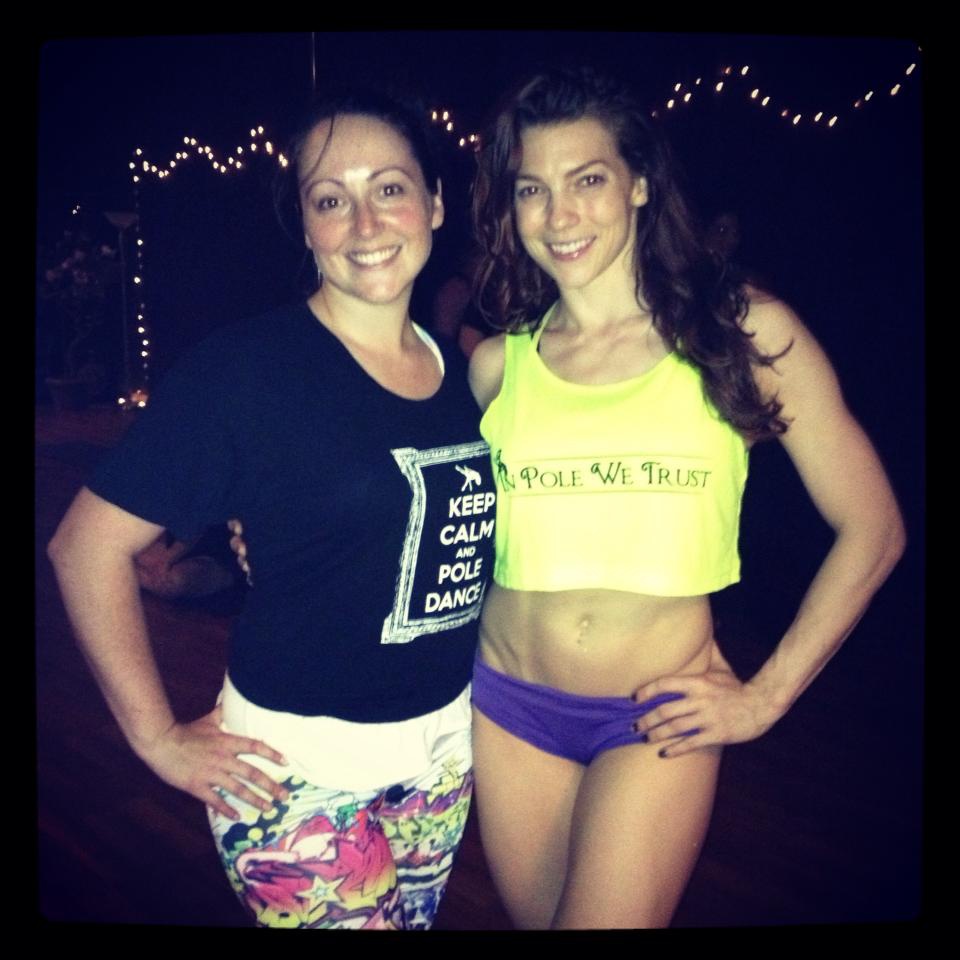
In Pole We Trust Cropped Tank in Yellow
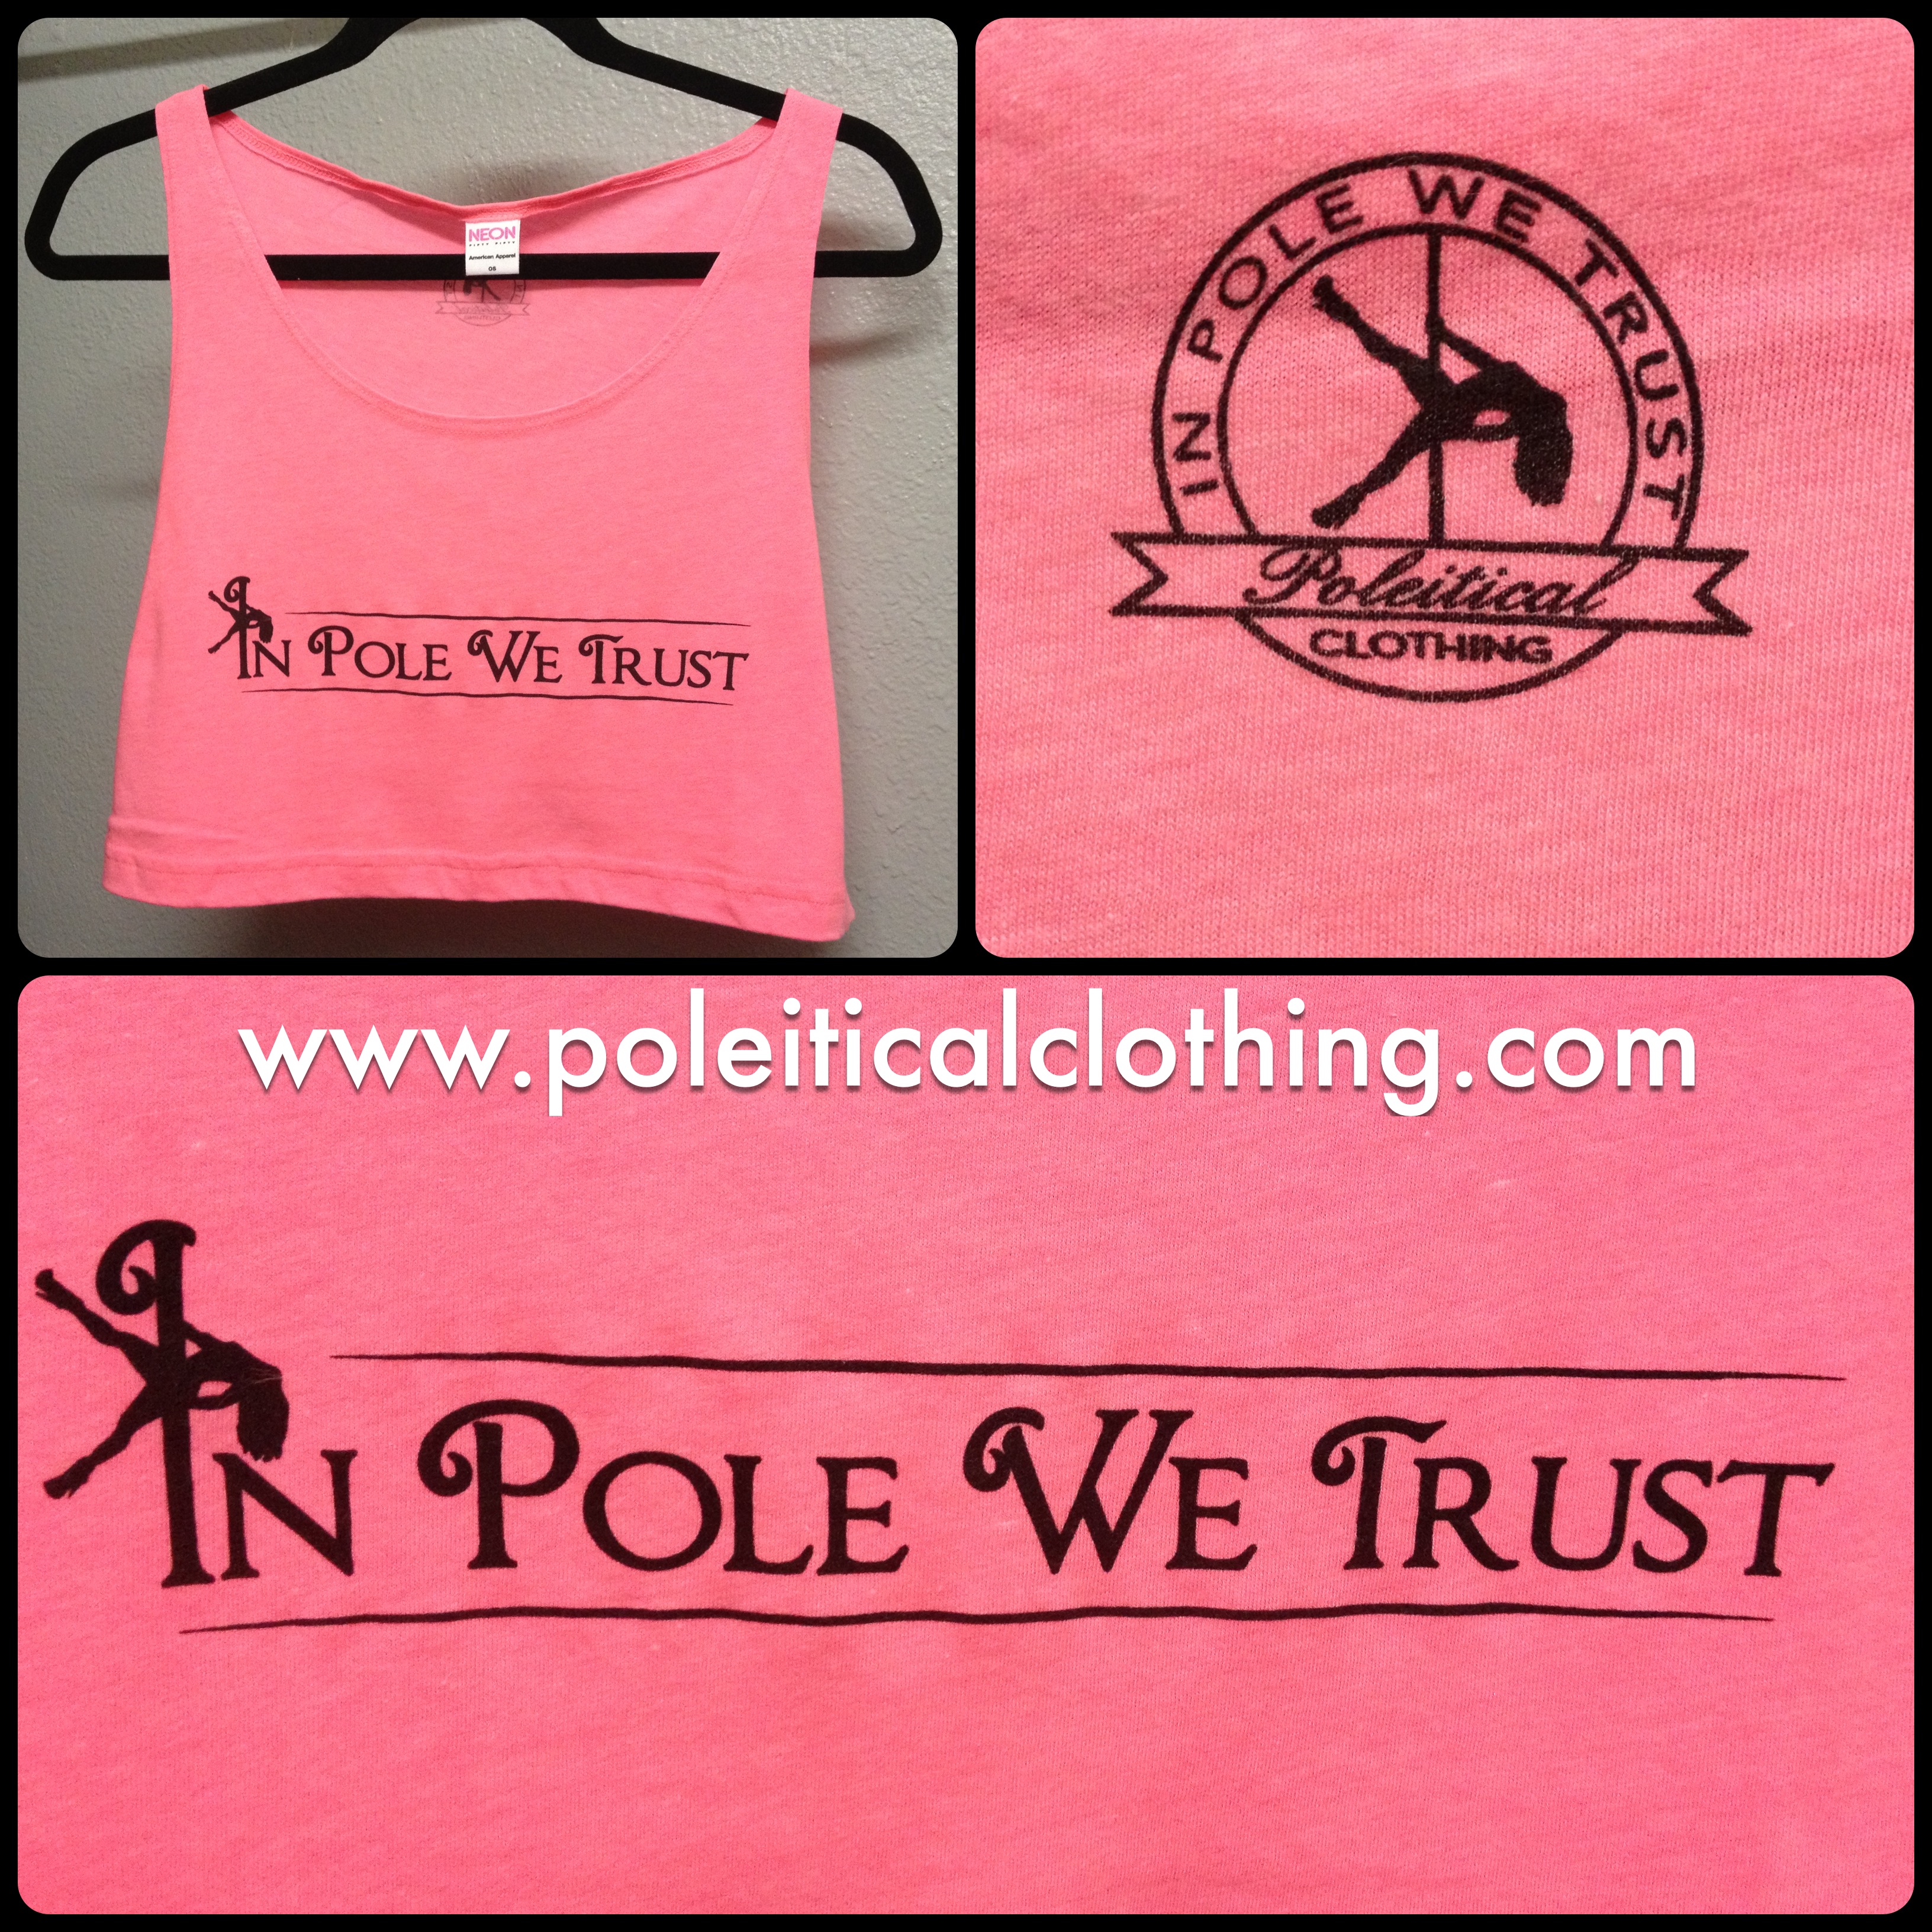
In Pole We Trust Cropped Tank in Pink
This super soft, super comfy tank comes in two amazing neon colors: screaming yellow and perfect pink! Cut for One Size Fits All, our In Pole We Trust tank is cropped under the bust and compliments a variety of body types. Our Poleitical Clothing logo is printing on the back, at the neck, and our new IN POLE WE TRUST artwork is splashed across the bust! This tank leaves your favorite grip points free and clear, allowing you to not have to sacrifice cute style for a solid move! Both tanks are priced at $20 USD each, with worldwide shipping available.
All items can be purchased online, through our Etsy Shop: http://www.etsy.com/shop/poleiticalclothing
Happy Shopping!
Tulip and Shoulder Mount Bomb
It’s been a while since I’ve posted anything, in part because I’ve been busy with life. In the last two months, I moved out of the apartment I had lived in for 9 and a half years (and in with my boyfriend), donated the car I’d had for almost 10 years (which I drove cross country during my move to LA), and I had a birthday. It’s been a big time of change, which has been great! Things are still evolving, too, so my brain has been all over the place. I haven’t had the funds to go to my home studio, so I’ve been using my stash of groupons to float around to other classes and studios. As such, I’ve gotten a chance to check out three other studios (two of which I had been to before, but it was interesting to visit again), but the change in my routine was a bit disruptive at first. However, I stumbled upon a class that I ended up loving, and since it’s the studio where I had the largest groupon, it’s been great – I’ll have my fourth class next week, and I am super excited about what we might be doing in it. I hope to get some time to write reviews of the different studios, but in the meantime, here are a couple of things I’ve worked on recently:
Tulip
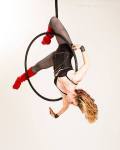
I saw this trick on Instagram (it’s like the secret society of pole dancers – everyone posts photos of tricks and offers advice to other polers on how to do them), popping up on the feeds of some of the people we follow through Poleitical Clothing‘s account. It’s a bold trick in terms of how it looks, but it’s not hard – just takes a little creative manipulation to get into it. I’ll include my description of how I get into it, but first, here’s the photo of me in the trick:
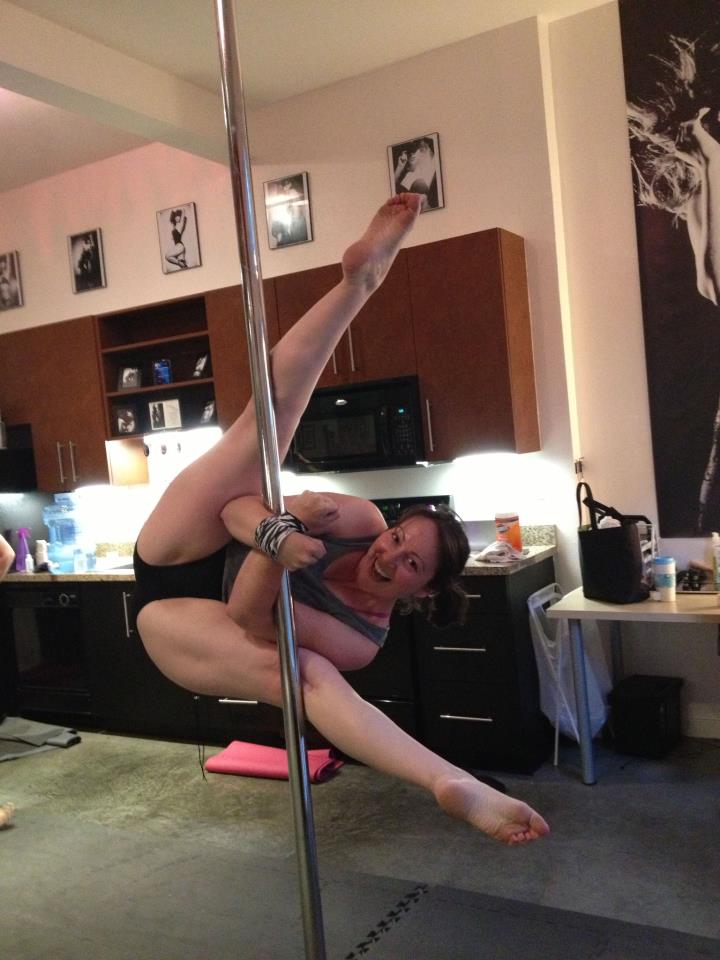
BAM! The Tulip. Subtle, it is not.
So, this is how I get into the Tulip:
- Invert to an outside knee hang (also sometimes called a butterfly hook) and stand up over it – this is how we describe the climb up to the position from where you could go into a superman or a jasmine, or continue to climb to do another invert of some kind. To explain the movement: from the knee hook, you’ll sit up and put your bottom hand on the pole below your knee hook, to push for leverage (I usually put it about parallel to my bottom hip) and put your top hand above the knee hook, to pull up. So, your head should then be above your upper leg, and you can use the front of the lower thigh as a lock by placing it against the pole as a grip.
- Moving on…from the sit up over your knee hook, swing your bottom leg down and place the bottom of your foot on the pole, bottom leg straight and pointing to the floor while keeping your hands and upper knee hook in place. Once this is secure, you can remove the bottom arm to pose in a Cupid (also called a Star in some circles). If you have a super duper strong knee hook, you can remove the top hand, too, and just grip with the knee/stabilize with the bottom foot while keeping your core tight – it takes a lot of strength and balance, so only do it if you’re sure you can handle it, or if you have a spotter.
- So, from the Cupid, I move into what we were calling the Devil’s Point, but I think people are calling it a Genie, too – you’ll reach back down between the legs to grab the pole again (and, if you’ve kept your upper hand on the pole, you’re all set – if not, grab the pole again above the upper knee). Once your hands are secure, and keeping that upper knee locked around the pole, you’ll remove the bottom foot and swing it in front of the pole, securing the pole in your bottom knee pit. Your knees should now be mirror images of each other, both gripping the pole, bottom hand gripping between the knees, upper hand still above the upper knee.
- From the Devil’s Point, you then reach your bottom arm between the pole and your crotch and secure an elbow grip with that arm – your arm will loop around the pole so that your hand is headed toward your face. Once that is locked, and keeping your knee grips solid, remove your upper hand and repeat the same elbow hook for the upper arm.
- Both arms should now be loop around the pole, hands pointed toward your face on the outside/front of the pole. Crossing the arms at the wrists seems to provide extra support. Now, you are ready to extend your legs to complete the trick! Press the backs of your knees against the pole while arching your back – you have to arch and stick your butt out a bit in order to get the extension to work and look pretty! Otherwise, you’ll end up with bent spider legs, especially if you aren’t super bendy.
- Once you extend the legs, you’re in it! Get a picture! To get out, simply re-grip your knees, and you can choose how to come out of it. So far, I’ve mostly been grabbing the pole and swinging the top knee off the pole and kind of just coming out of it, but it’s not pretty, so maybe try to get back into a Cupid – that’s my goal!
This left a whopper of a bruise on the inside of my lower knee, in part because I never use that knee as a grip. Even in Lyra, my right knee is my strong knee, so I do all of my single knee hangs from that side. My left knee was so upset after this trick! The bruise and the swollen bump with the bruise were no fun, so I’m leaving the trick alone for a few days, to allow it to heal.
I think this trick would be great on spinning pole, and that’s on my list of things to try with it!
I brought this trick into my new class from the groupons, and my instructor worked it out quickly from the sample photo, showing me how to get my legs straight. Next thing I knew, my side of the classroom all began trying it, which was neat to see. 🙂 That’s one of the things I love about pole – the instant inspiration that can happen. In that same class, I also learned what we were calling a Shoulder Mount Bomb, which is a variation of the shoulder mount pose, but with no hands (whuuuuuuut?!). Here’s a video of me playing with it, in the class:
Now, this trick can be done from an actual shoulder mount up into it, or from a regular invert, like I did in the video. I found it to feel more secure from the invert, but that’s just me. From the invert, you push up into a caterpillar, and instead of using your hands to grip the pole as you slide down, you actually bring your chest to the pole and make contact on the front of your usual side for shoulder mounts. As you slide (your hands can still be on the pole, if you aren’t feeling secure – I kept mine on), you begin to crunch and tuck yourself into a ball while keeping your knees gripping the pole – I used my legs, too, because I wanted to control my slide better, since your entire frame slides, not just the torso. As you crunch into the ball, the pole will roll/slide up to the meaty portion on the top of your shoulder. Your grip in your knees should be tight and the pressure on your shoulder should be solid so that you can remove your hands from the pole. It sounds super scary – definitely do it with a spotter at first – but it’s surprisingly solid. If you feel comfortable, you can also extend one leg at the knee WHILE STILL KEEPING YOUR KNEES GRIPPING TOGETHER (you know, so you don’t fall), as I do in the video. Our instructor took both feet behind the pole and kept her knees gripped, but I felt better having one leg still on the pole. You can see it all in the video. 🙂
I’m really liking this new class, which is at The Choreography House. I like the instructor, Veronika (she teaches at studios all over LA) – she’s got an incredible warm up, which has me closer to my left side (good side) split than ever before, and she teaches practical combinations and tricks, breaks down instructions well, and is quick to pick up on new tricks, as well as quick to adapt a trick to work for someone who is having trouble. Once my groupon is up, I am hoping to continue in her class, if not at ChoHo, then hopefully at another studio.
I dropped into two consecutive classes at my home studio (The Pole Garage), and it was SO nice to see everyone. I miss my social circle over there, which is one of the hard parts of floating around. I’m naturally reserved/shy with new people/classes, although I usually am just open and excited to see what new thing I’ll be shown that class. Anyway, on Wednesday night’s classes at PG, I got a chance to try two things I’ve wanted to try for a while: the elbow grip ayesha and the cartwheel handspring! I’d tried the ayesha ages ago, once, and fell out of it, so I never tried it again, despite wanting to give it another shot. It’s weird, but I was never in a class where anyone taught it, and I’d always forget to ask. I finally approached one of the rock star students at PG to ask her how to do it, and she talked me through it and spotted me, plus I got a chance to try it with the instructor spotting me later on. I like it! It’s a leap of faith, to be sure, and I need to adjust something to make it less tweaky on my bottom wrist/shoulder, but it felt way more solid than my twisted grip has felt in a while. I had a backslide with that – I never feel that solid in it anymore, for some reason. Anyway, the same rock star student also showed me a cartwheel handspring mount, which I tried a few times – it’s definitely an issue of working out what is going on with my bottom hand, because it hurt my wrist more than a twisted grip handspring. But, I had the right momentum, and I think it’ll be something I could keep trying to work on!
What about all of you? Any fun new tricks you’ve been working on?
Studio Review – Tiger Lily Vertical Fitness & Dance, Geneva, IL (USA)
Last fall, I had the pleasure of stopping by Tiger Lily Vertical Fitness & Dance while on a trip to the Chicago area, for a friend’s wedding. I had run some searches for pole studios in the area, looking for something that was reasonably close to my mom’s house, both for my own convenience AND in case she wanted to finally sign up for classes. 🙂

From the Tiger Lily website
Co-owned by Head Instructors Caroline and Sarah, Tiger Lily Vertical Fitness & Dance is located in Geneva, Illinois, which is a western suburb of Chicago. It’s a great location for anyone in the western suburbs – my mom lives about 40 minutes north, but it was an easy trip down one of the main thoroughfares that runs north/south in that area (Randall Road, which is also the road that the studio happens to be on). The studio is set in a storefront in a an upper-middle class area of the suburbs, and as soon as I walked in, I was impressed with the beauty of the set up. The lobby is splashed with color in a way that is both inviting and girlish without being overpowering, which I loved. There’s also a small boutique area, allowing students to conveniently purchase any supplies they might need!

Tiger Lily Boutique – photo from their Facebook page
Behind the privacy wall and curtains, you’ll find large studio area, painted in a deep grey with pink accents (same as the lobby). The space is beautiful, with an intimate feel to it. Mirrors line one wall, with a ballet bar for stretching, and you’ll find 9 permanent 50 mm Platinum Stages poles on which to flip and fly! A door at the back of the studio leads to a small dressing area for changing and storing your items, as well as a kitchenette (snacks and water are available for purchase) and bathroom. All in all, it is a great set up!
The studio offers pole classes of varying levels in session courses, as well as package deals available if you find yourself addicted and wanting to come to class more than once a week! I was lucky enough to get special permission ahead of time to sit in on a mixed level class, which allowed me to get an idea of how the teaching works at the studio. Sarah, the instructor, gave a great warm up that combined some strength and stretching exercises with a healthy dose of dance-inspired movement to raise our heart rates – she added in some fun, flirty accents, too! Sarah was careful to teach for everyone’s level, and when she saw I was more advanced than some of the other students, she gave me more advanced conditioning to do – one of the first things she had me do was start to work inverts on my bad side, as she correctly deduced that it was something I never did (and totally need to work on!). The spins and transitions she taught to all of us were pretty and very useful, no matter what your level. Each of the students was kind and welcoming to me, especially for me being an outsider – I was so impressed by their attitudes! Class wrapped up with a free style dance, allowing us to dance as a group and test out some of the things we’d all been working on. Overall, I really enjoyed it, and I felt like I got a great work out!
Tiger Lily Co-Owners and Head Instructors Sarah (L) and Caroline (R), from their website
Tiger Lily also offers various workshops throughout the year, like a striptease class, as well as specialty classes! The specialty classes include stretching and yoga based classes, including Fly Gym classes! I wish I’d had time to take one while I was there – dying to try it! In addition to their class schedule, Tiger Lily also offers party packages for gals looking to throw the perfect bachelorette or birthday party (or more!). They are also hosting and managing The Windy City Pole Dance Competition on April 13th, 2013, at Pheasant Run in St. Charles, IL!
FlyGym at Tiger Lily – photo from their Facebook page – great view of the studio interior!
With affordable pricing and a lovely set up, Tiger Lily Vertical Fitness & Dance makes a great addition to the Chicago pole studio scene!
You can find Tiger Lily Vertical Fitness at 1749 S. Randall Rd. ~Suite G, Geneva, IL 60134 (located next to Mario Tricoci Salon and Day Spa), and online at http://www.tigerlilyverticalfit.com and on Facebook!
Poleitical Clothing *GIVEAWAY*!!!
I am SO excited to announce a new Poleitical Clothing Giveaway with Pole Dancing Adventures!!!

We will be giving away some of our new merchandise: one Keep Calm and Pole Dance Off-The-Shoulder sweatshirt in pink and one pair of our Keep Calm and Pole Dance Perfect Pole Shorts in red! Open to US and International entries! Sizes small through extra large for the sweatshirts, and sizes extra small through extra large for the shorts (all US Standard). Contest ends 2/18/2013! Multiple ways to enter! You could win $60 worth of free merchandise! Full details, including terms and conditions, are over on the PDA blog. Enter today by going here:
Best of luck, and Happy Poling!

