Blog Archives
Split Stretches
As some of you may know, I got my split somewhat recently. I was looking back through old photos and actually found a photo of my split from a few months ago, which my boyfriend took at my request – I think I had wanted to chart my progress, but then never followed through on progression photos. However, I do have this side by side comparison:
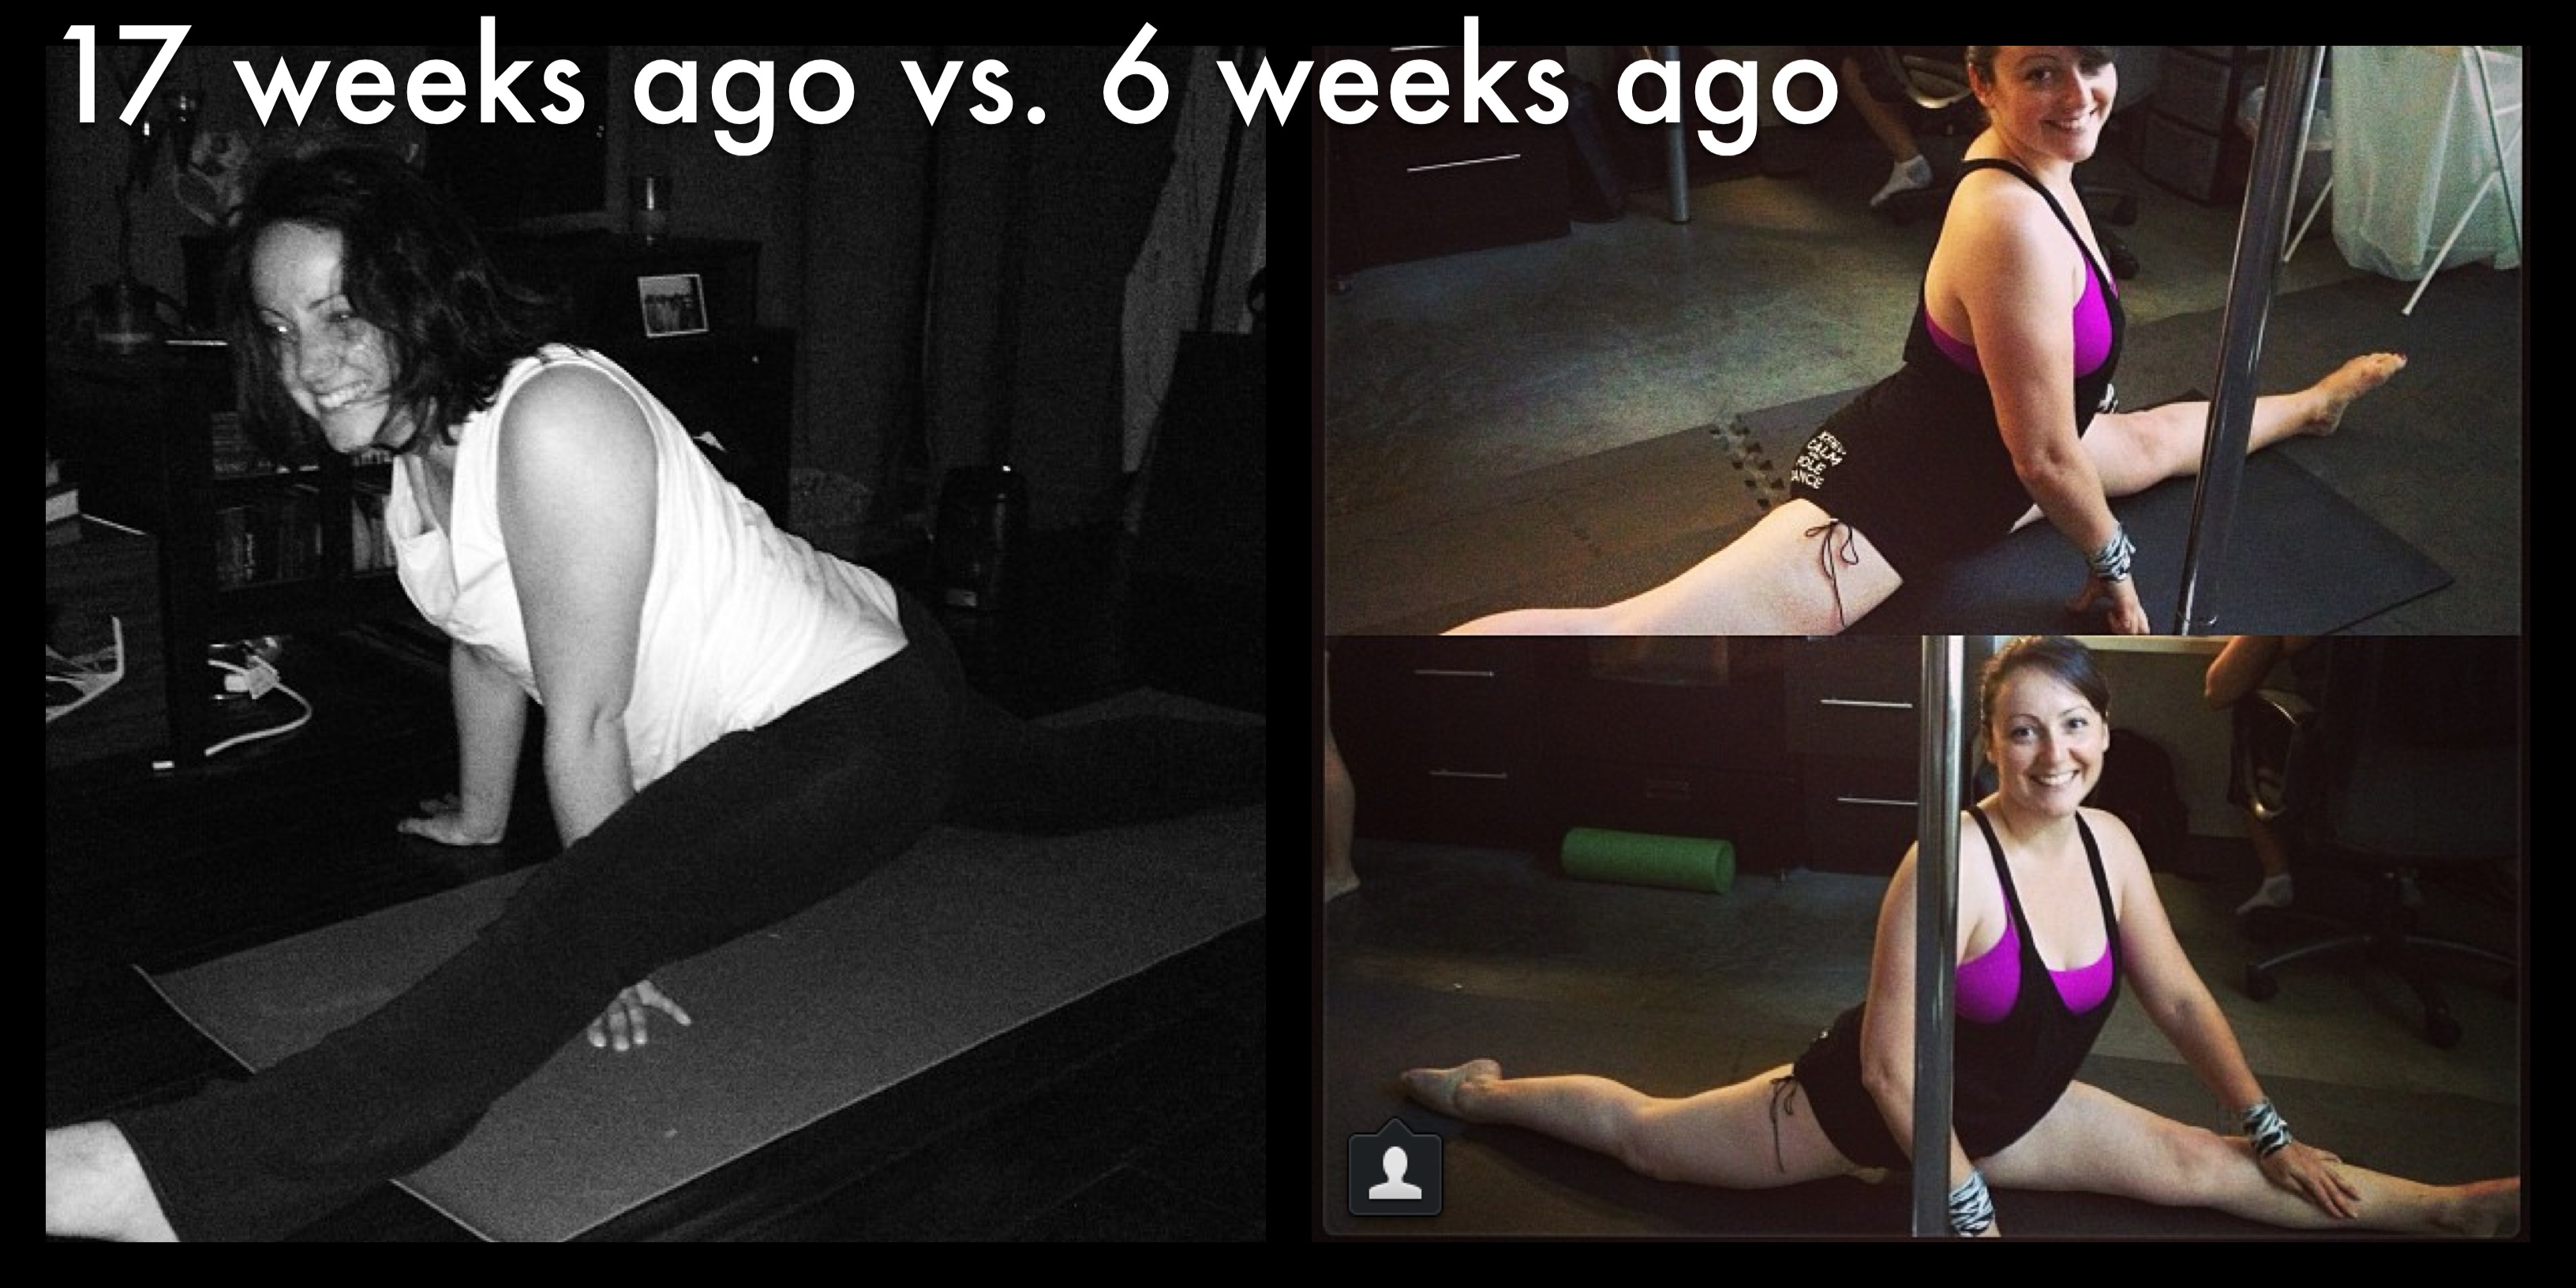
left split progress – approximately April 2013 to July 2013
I still have a lot of work to do: I want to get my hips squared and have an easier time with getting into the split overall, plus work on my right split and center splits. Right now, I can get into my left split with A LOT of warming up in class. It takes the right combination of stretches, plus some heat in the room, and probably some other factors (hydration, energy level, etc) to get my front leg to the floor. I am not super flexible in general, so to even get this far is a HUGE deal for me!
Since a few people have asked me what stretches I was doing to help with my progression, I put together a quick video of part of the warm up that we usually do in my Monday night class. (A good number of these are stretches from other classes, too – I’ve just found that Monday’s sequence warms me up the best.) Our usual warm up is 30-45 minutes long, and we go through exercises, movement, and stretching for the entire body – it’s the longest of any warm up, in any of my classes, but I love it – I feel more prepared and conditioned by it than some of the shorter, strength conditioning based warm ups that I do. I think this warm up works because of my specific body – I take FOREVER to warm up, even when I am not doing pole, and my asthma doesn’t play well with cardio-based warm ups. Not only do I have more split flexibility from this warm up, but my shoulder flexibility is noticeably better. I can’t hit a Scorpion stretch fully quite yet, but I can now roll through my shoulder in one part and reach across my chest in a twist to grab my foot, neither of which I could do before joining this class.
The video is made up of stills of the different stretches we do for legs. It doesn’t hit all of the movement we do in the warm up, nor does it show some of the other moves we do that I believe help with hip and lower back opening, but I think it’s an excellent sequence for leg stretching. I only work on my right side in the photos, but we repeat the sequence on the left (and the photos may be out of order from how we do it in class, I can’t remember). This is really for overall leg/hip stretching and conditioning, with a focus on side splits – I don’t hit everything we do for center splits – since I don’t have mine yet, I felt that focusing on the split I have gotten was more important when talking about my journey and progression.
We hold the stretches for longer than the video, obviously – it is a quick overview with basic directions. Please note that I am NOT a pole instructor or a personal trainer, so you assume responsibility when you try these on your own – do them at your own risk and only do what feels comfortable for your body. Not everyone has the same flexibility, and doing new stretches without proper guidance can be tricky, so ultimately, BE SAFE!
(And special thanks to my patient boyfriend, who is ever supportive of my crazy pole obsession – he served as photographer.)
The Aussie Invasion
On Sunday, June 2nd, I was lucky enough to nab a ticket to Girl Next Door Show – A Pole Dance Soiree: The Australian Edition, featuring six of Australia’s best pole dancers! It was an epic show, filled with incredible and incredibly diverse performances from the Aussies and some of the American GND cast.
I have had the pleasure of seeing four of these dancers before, at last year’s International Master’s Cup and Pole Con 2012, but it was so special and inspiring to see them again.
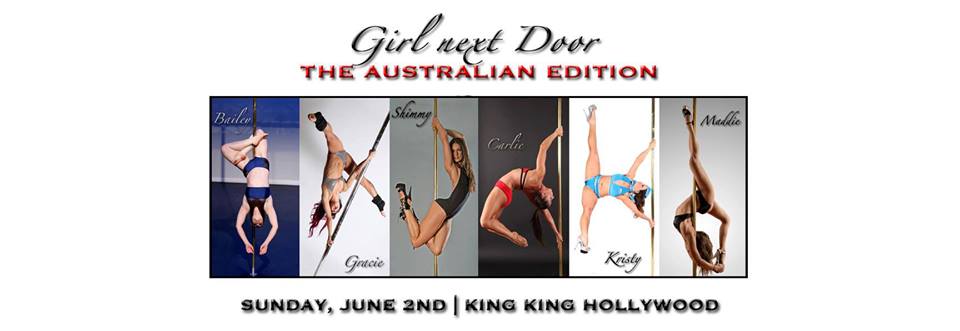
(photo from the GND Facebook page)
Bailey Hart
I had seen Bailey perform at Master’s Cup and at Pole Con, and let me tell you – she’s spellbinding. When I was watching her at Master’s, I was also volunteering to run the video camera for the event, and I could not watch her through the lens – I *had* to look up and see her “live”…she brings so much emotion to what she does, and she chooses what I think are unconventional moves that combine strength, grace, and emotion in a beautiful way. I ended up falling in love with her performance at Masters and Pole Con – it was my favorite of the night (no shade to anyone else), and her performance at Girl Next Door was also beautiful, with a gorgeous sensuality to it. Here is a link to her performance on Facebook – if I can find a YouTube link to embed, I will update the post:
https://www.facebook.com/photo.php?v=10151483866836028&set=vb.205514531347&type=2&theater
Gracie Buntine
Prior to GND, I wasn’t too familiar with Gracie, other than hearing her name now and then. I can say, without hesitation, that she made a fan of me that night! Her style is gorgeous – she floats, combining power and grace with a beautiful ease of movement. Our entire group fell in love with her performance. Check out her Australian Pole Championships performance.
UPDATE: Gracie’s GND performance is now online! See it on Facebook:
https://www.facebook.com/photo.php?v=10151500112546028
Michelle Shimmy
I think Shimmy is familiar to most pole dancers, and I know I have watched a number of her videos – tutorials, performances, freestyles, you name it, she’s got it online! I had seen her before at Master’s Cup, where her choice of music really stood out to me – it was like she was dancing for my 15 year old self. 🙂 Anyway, if you know Shimmy, you know she is power and sass and beautiful form. Her lines are always gorgeous, and she knows damn well how to work a crowd! Her performance was cheeky and filled with ballsy strength and beauty. Shimmy put her performance on YouTube, so you can watch it in the post!
Carlie Hunter
I love Carlie‘s strength – every time I watch her, I’m struck at how powerful she is, and how much she COMMITS to her character of choice. There’s a true fearlessness to what she does, and it’s awesome. I saw her perform at Master’s Cup, and then a day or two later, saw her at Pole Con, and the performances were so different in content, but equally impressive. Carlie chose to do her famous (and award winning!) Grandma Clementine routine for GND, and if you haven’t seen it, you have missed out! Here’s the link to the Facebook video – I am hoping it goes up on YouTube, so I can embed it!
https://www.facebook.com/photo.php?v=10151477549736028
Kristy Sellars
Kristy opened the show, and she’s just the cutest thing ever! She really dances and commits not only to character, but also in the way she connects to the audience. She doesn’t just dance, she really PERFORMS, and it’s SO MUCH FUN! I loved her routine – her costume was a gorgeous Kelly Maglia creation, and she had adorable styling to go along with it. Everything fit her music perfectly. Unfortunately, her performance doesn’t appear to be online yet, but in the meantime, do yourself the incredible favor of watching her KILLER winning performance from Miss Pole Dance Victoria. She does an amazing job of using her props to further her character and story! Her costume is amazing, and she sells that character 100% – her spirit is infectious, and on a personal note, as a pole dancer with curves, I love that she’s got some curves, too – she’s totally hot!
Maddie Sparkle
After Maddie‘s performance, I think our entire group of girls wanted to BE her. She’s just got this energy that is absolutely compelling – she’s got power, flexibility, sass, sexiness, and there’s that smile…you fall in love with her when she’s on stage. I remember her from Master’s Cup, too, and it was the same thing – I just instantly LIKED her, and I think she’s incredible. Maddie’s GND routine is on YouTube, so here you go!
Overall, the night was amazing – the ladies of The Pole Garage made it an event (I really don’t even know how many of us were there), and it felt like 90% of the pole dancers in LA were in attendance. I recognized people all over the place! It was like the Pole Oscars or something. 🙂 Keep an eye out for the videos for all of these ladies – I’ll post them if I find them!
Happy Poling!
xoxo
Tulip and Shoulder Mount Bomb
It’s been a while since I’ve posted anything, in part because I’ve been busy with life. In the last two months, I moved out of the apartment I had lived in for 9 and a half years (and in with my boyfriend), donated the car I’d had for almost 10 years (which I drove cross country during my move to LA), and I had a birthday. It’s been a big time of change, which has been great! Things are still evolving, too, so my brain has been all over the place. I haven’t had the funds to go to my home studio, so I’ve been using my stash of groupons to float around to other classes and studios. As such, I’ve gotten a chance to check out three other studios (two of which I had been to before, but it was interesting to visit again), but the change in my routine was a bit disruptive at first. However, I stumbled upon a class that I ended up loving, and since it’s the studio where I had the largest groupon, it’s been great – I’ll have my fourth class next week, and I am super excited about what we might be doing in it. I hope to get some time to write reviews of the different studios, but in the meantime, here are a couple of things I’ve worked on recently:
Tulip
I saw this trick on Instagram (it’s like the secret society of pole dancers – everyone posts photos of tricks and offers advice to other polers on how to do them), popping up on the feeds of some of the people we follow through Poleitical Clothing‘s account. It’s a bold trick in terms of how it looks, but it’s not hard – just takes a little creative manipulation to get into it. I’ll include my description of how I get into it, but first, here’s the photo of me in the trick:
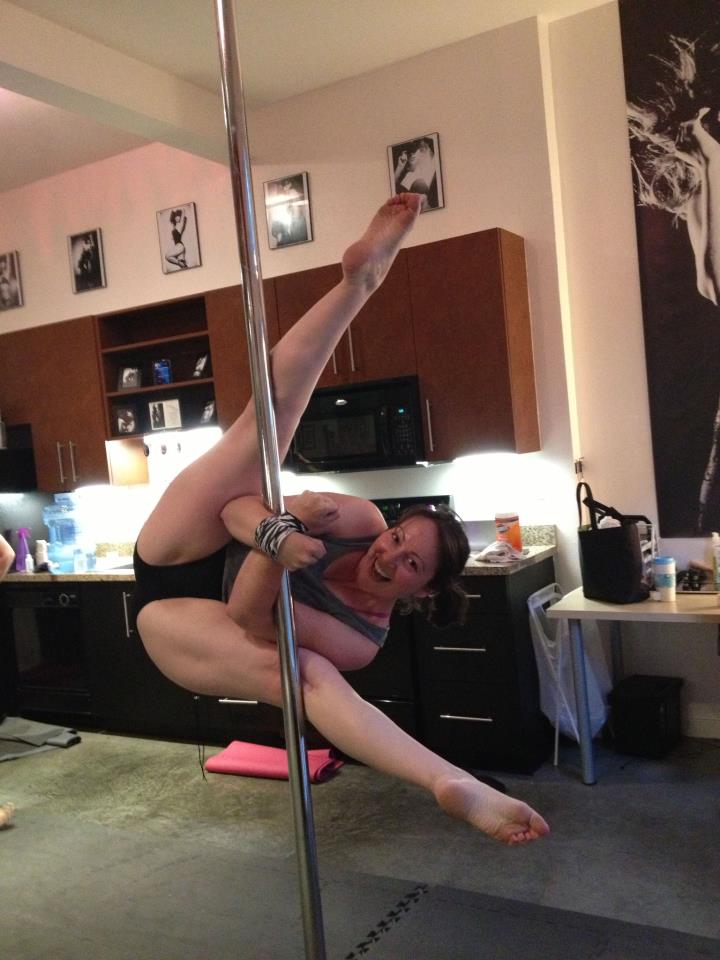
BAM! The Tulip. Subtle, it is not.
So, this is how I get into the Tulip:
- Invert to an outside knee hang (also sometimes called a butterfly hook) and stand up over it – this is how we describe the climb up to the position from where you could go into a superman or a jasmine, or continue to climb to do another invert of some kind. To explain the movement: from the knee hook, you’ll sit up and put your bottom hand on the pole below your knee hook, to push for leverage (I usually put it about parallel to my bottom hip) and put your top hand above the knee hook, to pull up. So, your head should then be above your upper leg, and you can use the front of the lower thigh as a lock by placing it against the pole as a grip.
- Moving on…from the sit up over your knee hook, swing your bottom leg down and place the bottom of your foot on the pole, bottom leg straight and pointing to the floor while keeping your hands and upper knee hook in place. Once this is secure, you can remove the bottom arm to pose in a Cupid (also called a Star in some circles). If you have a super duper strong knee hook, you can remove the top hand, too, and just grip with the knee/stabilize with the bottom foot while keeping your core tight – it takes a lot of strength and balance, so only do it if you’re sure you can handle it, or if you have a spotter.
- So, from the Cupid, I move into what we were calling the Devil’s Point, but I think people are calling it a Genie, too – you’ll reach back down between the legs to grab the pole again (and, if you’ve kept your upper hand on the pole, you’re all set – if not, grab the pole again above the upper knee). Once your hands are secure, and keeping that upper knee locked around the pole, you’ll remove the bottom foot and swing it in front of the pole, securing the pole in your bottom knee pit. Your knees should now be mirror images of each other, both gripping the pole, bottom hand gripping between the knees, upper hand still above the upper knee.
- From the Devil’s Point, you then reach your bottom arm between the pole and your crotch and secure an elbow grip with that arm – your arm will loop around the pole so that your hand is headed toward your face. Once that is locked, and keeping your knee grips solid, remove your upper hand and repeat the same elbow hook for the upper arm.
- Both arms should now be loop around the pole, hands pointed toward your face on the outside/front of the pole. Crossing the arms at the wrists seems to provide extra support. Now, you are ready to extend your legs to complete the trick! Press the backs of your knees against the pole while arching your back – you have to arch and stick your butt out a bit in order to get the extension to work and look pretty! Otherwise, you’ll end up with bent spider legs, especially if you aren’t super bendy.
- Once you extend the legs, you’re in it! Get a picture! To get out, simply re-grip your knees, and you can choose how to come out of it. So far, I’ve mostly been grabbing the pole and swinging the top knee off the pole and kind of just coming out of it, but it’s not pretty, so maybe try to get back into a Cupid – that’s my goal!
This left a whopper of a bruise on the inside of my lower knee, in part because I never use that knee as a grip. Even in Lyra, my right knee is my strong knee, so I do all of my single knee hangs from that side. My left knee was so upset after this trick! The bruise and the swollen bump with the bruise were no fun, so I’m leaving the trick alone for a few days, to allow it to heal.
I think this trick would be great on spinning pole, and that’s on my list of things to try with it!
I brought this trick into my new class from the groupons, and my instructor worked it out quickly from the sample photo, showing me how to get my legs straight. Next thing I knew, my side of the classroom all began trying it, which was neat to see. 🙂 That’s one of the things I love about pole – the instant inspiration that can happen. In that same class, I also learned what we were calling a Shoulder Mount Bomb, which is a variation of the shoulder mount pose, but with no hands (whuuuuuuut?!). Here’s a video of me playing with it, in the class:
Now, this trick can be done from an actual shoulder mount up into it, or from a regular invert, like I did in the video. I found it to feel more secure from the invert, but that’s just me. From the invert, you push up into a caterpillar, and instead of using your hands to grip the pole as you slide down, you actually bring your chest to the pole and make contact on the front of your usual side for shoulder mounts. As you slide (your hands can still be on the pole, if you aren’t feeling secure – I kept mine on), you begin to crunch and tuck yourself into a ball while keeping your knees gripping the pole – I used my legs, too, because I wanted to control my slide better, since your entire frame slides, not just the torso. As you crunch into the ball, the pole will roll/slide up to the meaty portion on the top of your shoulder. Your grip in your knees should be tight and the pressure on your shoulder should be solid so that you can remove your hands from the pole. It sounds super scary – definitely do it with a spotter at first – but it’s surprisingly solid. If you feel comfortable, you can also extend one leg at the knee WHILE STILL KEEPING YOUR KNEES GRIPPING TOGETHER (you know, so you don’t fall), as I do in the video. Our instructor took both feet behind the pole and kept her knees gripped, but I felt better having one leg still on the pole. You can see it all in the video. 🙂
I’m really liking this new class, which is at The Choreography House. I like the instructor, Veronika (she teaches at studios all over LA) – she’s got an incredible warm up, which has me closer to my left side (good side) split than ever before, and she teaches practical combinations and tricks, breaks down instructions well, and is quick to pick up on new tricks, as well as quick to adapt a trick to work for someone who is having trouble. Once my groupon is up, I am hoping to continue in her class, if not at ChoHo, then hopefully at another studio.
I dropped into two consecutive classes at my home studio (The Pole Garage), and it was SO nice to see everyone. I miss my social circle over there, which is one of the hard parts of floating around. I’m naturally reserved/shy with new people/classes, although I usually am just open and excited to see what new thing I’ll be shown that class. Anyway, on Wednesday night’s classes at PG, I got a chance to try two things I’ve wanted to try for a while: the elbow grip ayesha and the cartwheel handspring! I’d tried the ayesha ages ago, once, and fell out of it, so I never tried it again, despite wanting to give it another shot. It’s weird, but I was never in a class where anyone taught it, and I’d always forget to ask. I finally approached one of the rock star students at PG to ask her how to do it, and she talked me through it and spotted me, plus I got a chance to try it with the instructor spotting me later on. I like it! It’s a leap of faith, to be sure, and I need to adjust something to make it less tweaky on my bottom wrist/shoulder, but it felt way more solid than my twisted grip has felt in a while. I had a backslide with that – I never feel that solid in it anymore, for some reason. Anyway, the same rock star student also showed me a cartwheel handspring mount, which I tried a few times – it’s definitely an issue of working out what is going on with my bottom hand, because it hurt my wrist more than a twisted grip handspring. But, I had the right momentum, and I think it’ll be something I could keep trying to work on!
What about all of you? Any fun new tricks you’ve been working on?
Give a little love
I had a weird thought the other day, while in my stretch and flex class at CH. During the class, you obviously do a ton of stretching, but each class focuses a little more on one thing or the other, depending on what the instructor plans for the day. This week, we worked a lot on our splits and backs. Now, I am not terribly flexible. I have *some* flexibility in doing a seated splay on the floor and folding over it, to try to get my chest to the floor. But, in most respects, I am not flexible. My back, shoulders, legs, hips…not flexy. I have strength, I have a reasonable amount of grace (or so I am told – I point my toes most of the time!), but flexibility is not my strong suit.
Anyway, we were doing a stretch on our backs, pulling one straightened leg up and as close to our chests/faces as we could, and I caught myself just staring at my foot. Really staring at it. Moving it this way and that, looking at the tendons move, etc.
And – even if this makes me sound like a lunatic – I kind of fell in love with it.
Here’s the thing: to be an artist is to learn how to express through a given instrument. I don’t care what kind of art you do – it’s a form of expression. For some folks, their instrument is a pen, or a paint brush; for others, it’s a computer; others, it’s a guitar or an oboe; for some, it’s their voice, through song or spoken words; writers of all kinds, actors, dancers…whatever type of artist you are, there is some kind of instrument that allows you to release your expression into the world.
I think that the best way to tap into that is to fall in love with whatever your instrument might be – and to connect with it, and yourself, in such a way that the expression is fluid.
For a pole dancer, falling in love with your body is a pretty important thing. And, it might be daunting. You might hate your thighs. Or your skin. Or something that nobody else notices but you. I know I have things about myself I’m less than thrilled with…
But, in that moment, I was totally in love with my foot. I went through the rest of the class amazed by all of the things our bodies could do, but most of all, what my body did. I was surprised and challenged and thrilled by all of it.
I think that will be one of my things to keep in mind, from here on forward: take the chance to be present and fall in love with my body every time I am in a class, even if it’s piece by piece. Sometimes, pole can be so challenging that it feels antagonistic, so a little love could go a long way.
Quick Survey – stretch & flex – shoulder mount!
Hey Polers – would you please take a few minutes to fill out this survey for me?
http://freeonlinesurveys.com/app/rendersurvey.asp?sid=4rrveu3f9tq23ag90969
We’re working to get our pole apparel line up and running, and this survey will help us focus on what everyone out there is looking for in their choices for pole shirts/tanks/shorts, etc! If you’ve got any pole sisters (or brothers!), please share it with them as well! THANK YOU!
This weekend, with my usual Lyra class canceled for the holiday, AND my back-up Lyra class canceled, I opted to finally try a stretching and flexibility class over at The Choreography House in North Hollywood. Overall, it was a good experience! I LOVED the content of the class: at two hours long, it’s a ball-buster! My class was co-taught by Kelly (owner of the studio) and Carolyn, who took turns leading us all in different stretches. We focused a lot on splits and middle splits (ow), and there was an entire section on back flexibility that still has me hurting! Since I am not particularly flexible, there were moments where I struggled a bit, but I still felt like I could keep up with most of it. I hope to get there, though! I also hope to be able to take some of it with me, into my regular pole class at The Pole Garage, or even at home. It seems like the classes fill up quickly, but I did manage to book another one in a couple of weeks. I was able to introduce myself to Carolyn before I left, which helped me feel a little more welcome: in my two experiences at that studio, I haven’t felt like the gals were particularly warm or welcoming toward new faces, but Carolyn was so sweet and such a good instructor that I am looking forward to the next class. About 3/4 of the way through the class, they have a tradition of stopping to watch a video for inspiration – this is the video that we watched, which blew my mind:
INSANE, yes?! Amazing.
I did a make-up pole class yesterday, since my usual class is canceled for the holiday, and I was kind of useless because of the stretching class (really: it packs a punch), but I did manage to work on holding my shoulder mount for a while. Abby, one of the newer instructors at TPG, wanted us to all work on holding our shoulder mounts in a splay before shooting up to connect to the pole. I was so surprised that I could do it!! I usually just shoot up into the mount, but was thrilled to see that I could hold it – even while tired. I have a shoulder mount variation that I would love to be able to do in the future, and it requires a ton of power in holding the shoulder mount (Bailey Hart has an entire sequence of shoulder mount work in her Winter’s Child routine, which she did at PoleCon2012 and at the International Pole Dance Master’s Cup 2012, and a number of other pole stars have some amazing variations as well). A lot of great pole champs have amazing shoulder mount combos, which I always love to see! Check out one of Alethea’s:

Alethea Austin in a shoulder mount variation
Happy Labor Day, everyone!

